free UK postage
over £40.00
Search


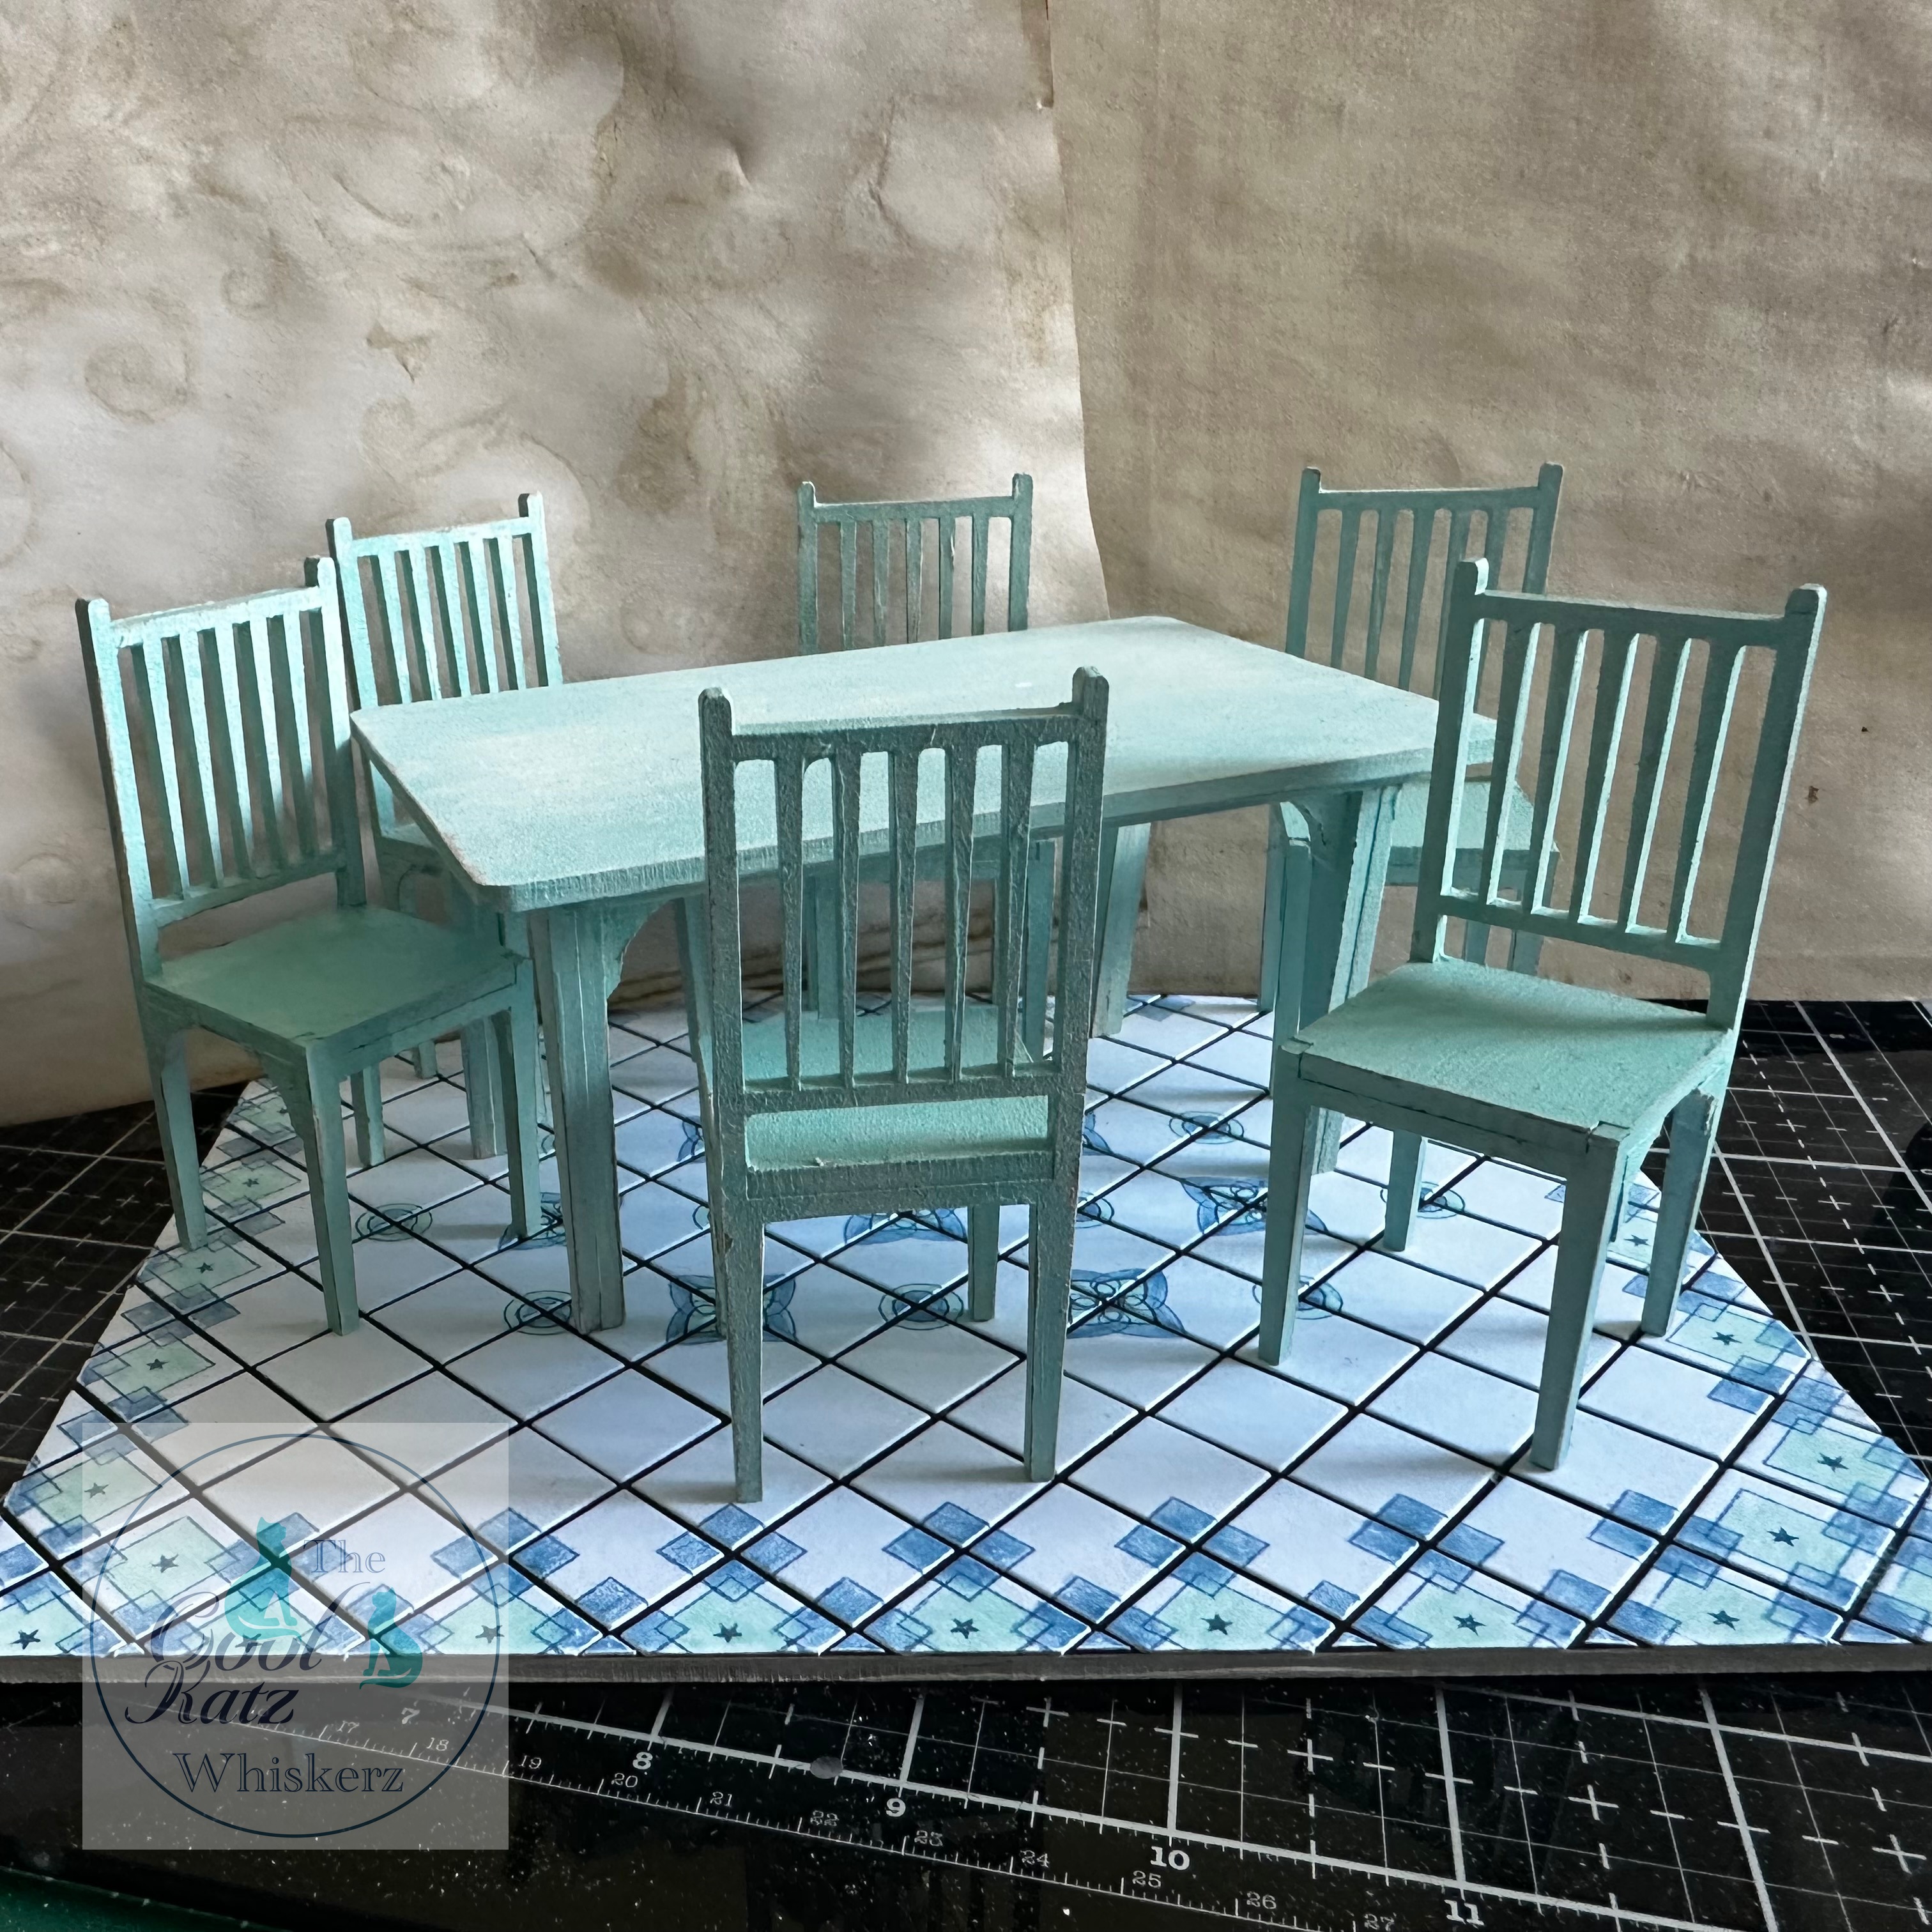
With a sharp craft knife carefully remove all the pieces from the reverse. They are held in place with a tiny pip like section of the MDF which when cut through will release the piece. Keep the pieces in the order they appear on the layout diagram, this will help you know which piece is which. Lightly sand all the pieces to get rid of any imperfections and then follow the instructions in the kit to make up the table and chairs. Set these aside to completely dry I prefer to leave them over night.I like to give any MDF piece a coat of gesso as this prevents further coats of paint from seeping into the fibres, and therefore saves you time and money……. which we all love.
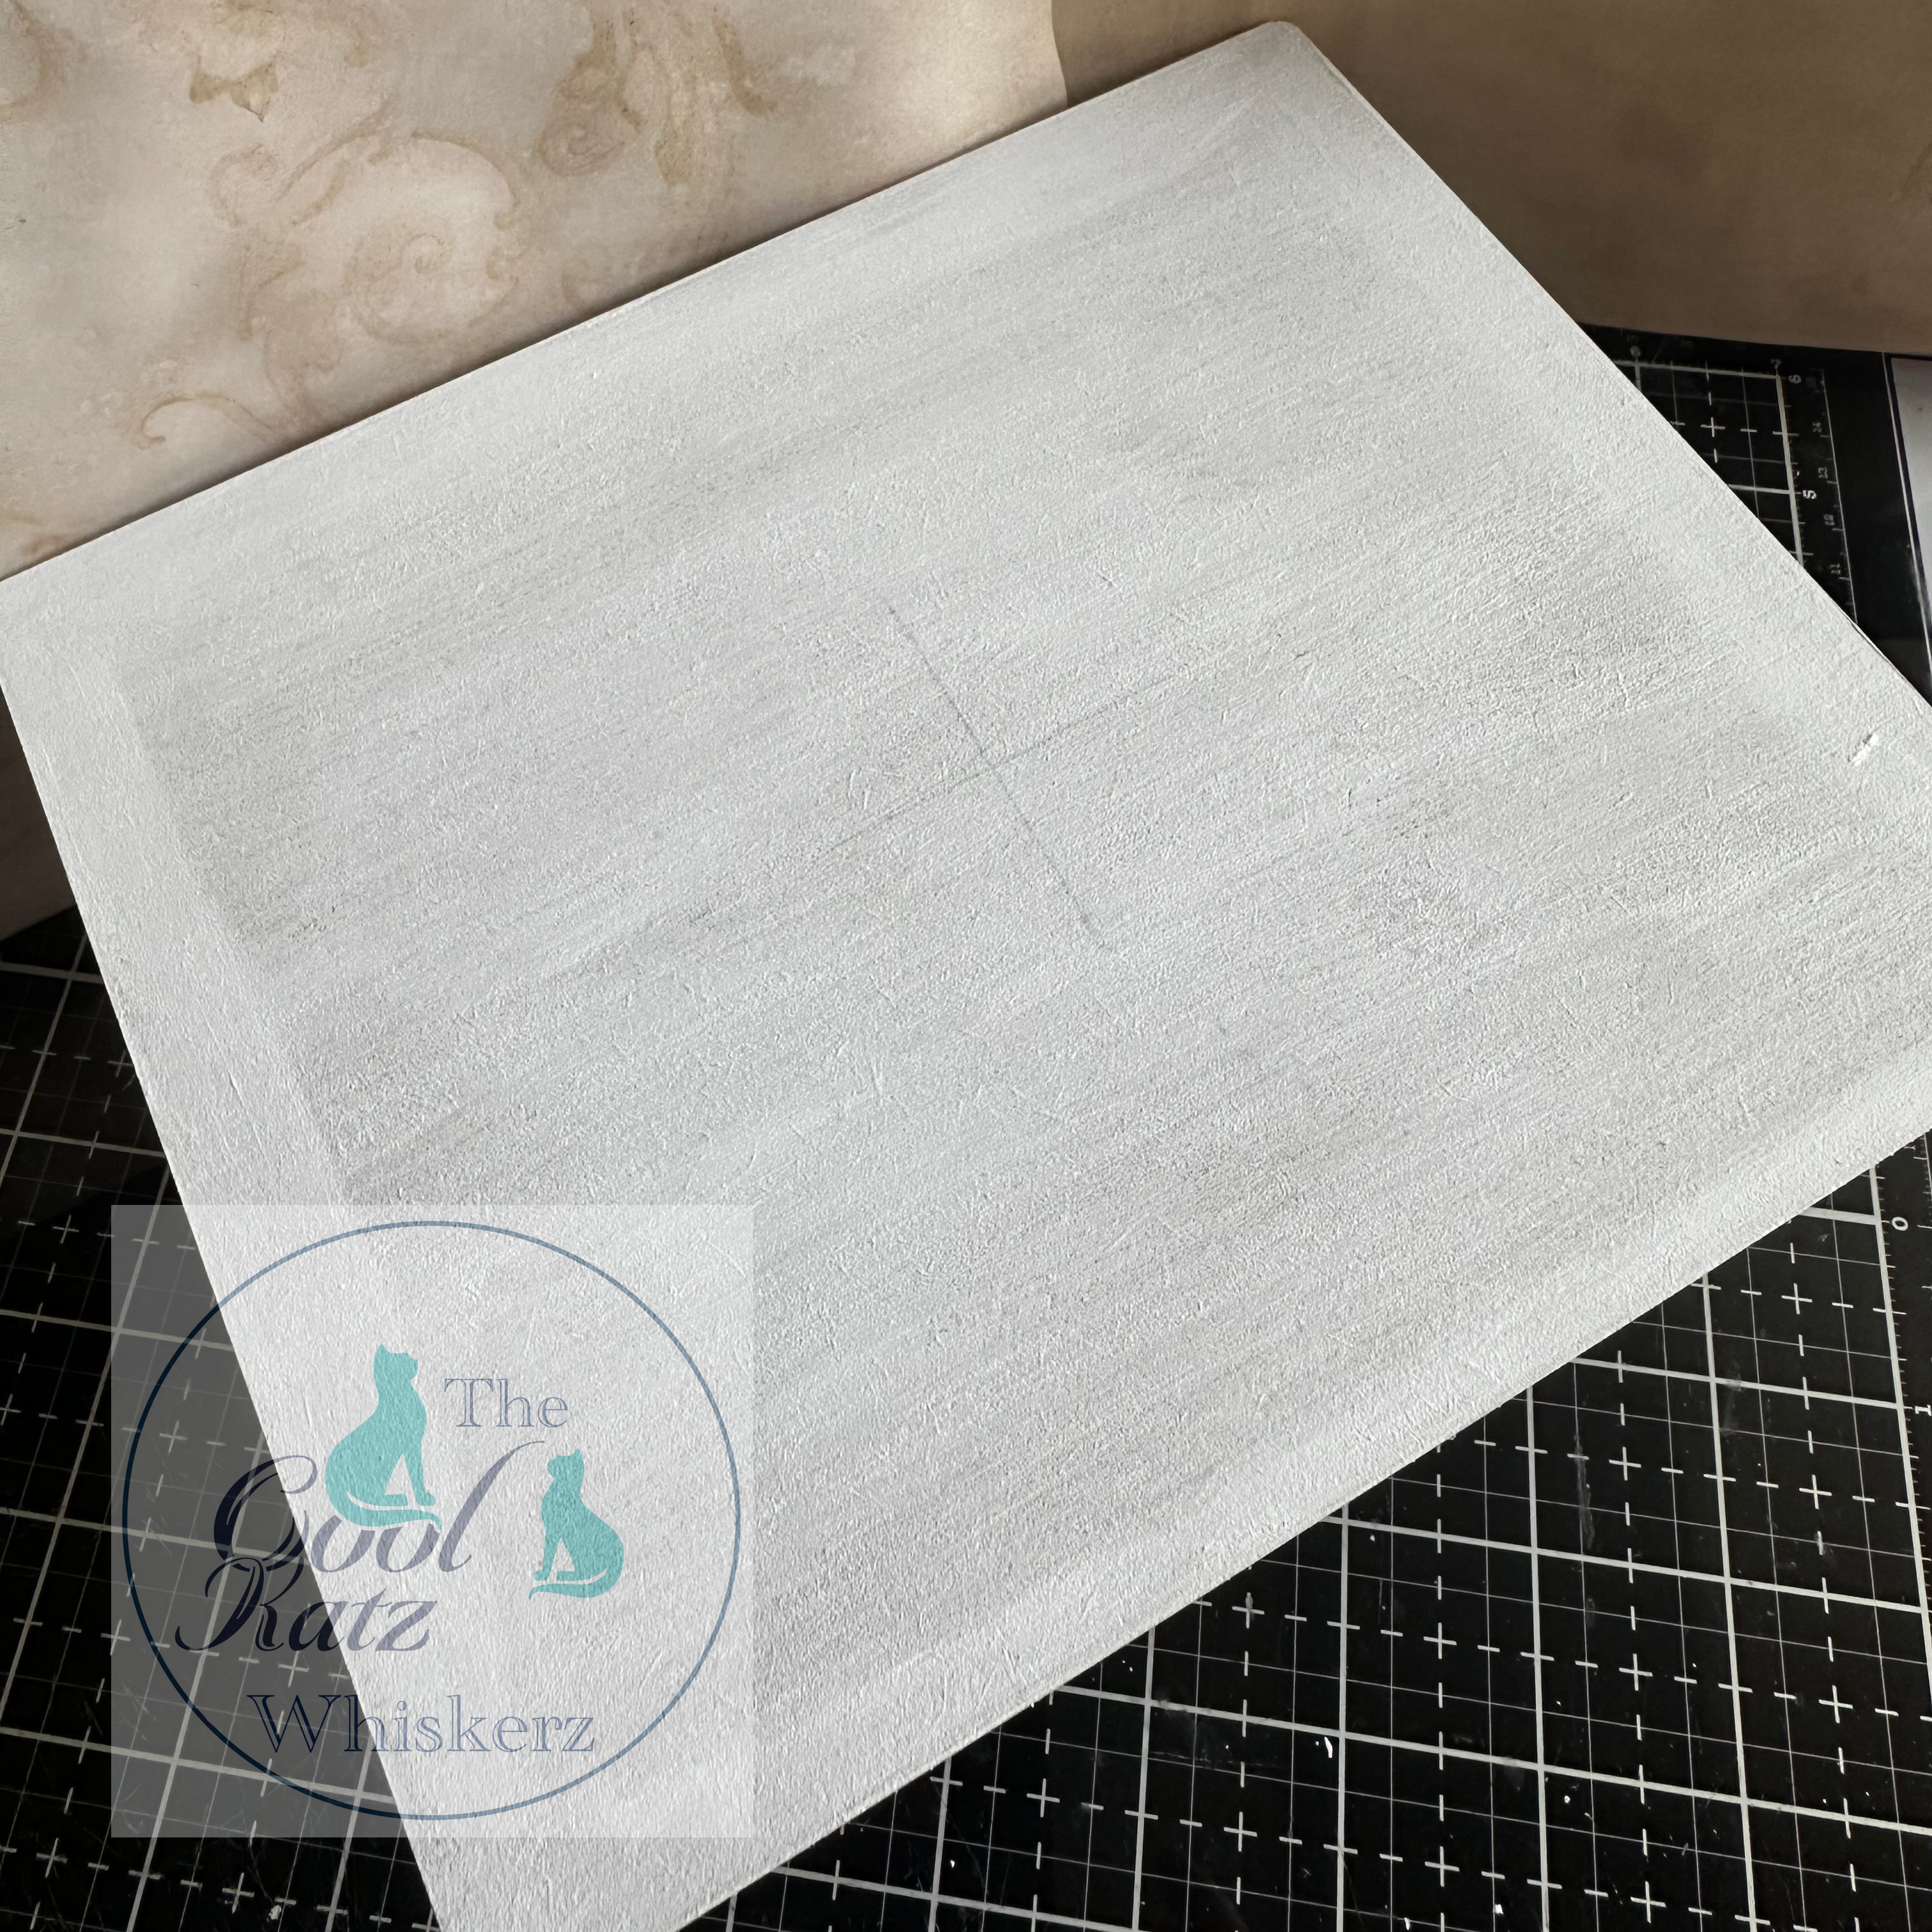
I gave all of the pieces a light coat of gesso including the floor base on both sides, Take your time and if needs be paint the pieces in sections and allow to dry before completing each piece. So, for example I painted one side of the floor and once dry I turned it over and painted the other side making sure that the edges were also covered in gesso.
Again, I like to then leave the pieces overnight to dry out thoroughly. Once the pieces have dried, I give them a very light sanding, this makes sure there are no imperfections ie loose hairs from the paint brush or dust particles. Then you have a beautifully smooth base ready for your chosen colour of top coat.
Next measure both ways across the floor base and mark out the centre with a cross, this will help you with tiling should you decide to tile your kitchen floor. This will ensure your tiling starts at the centre point and works its way out evenly. I you decide to have a coloured grout in-between your tiles paint your chosen colour and let it dry before marking out the centre. I used a sharp pencil and kept the marks very light.
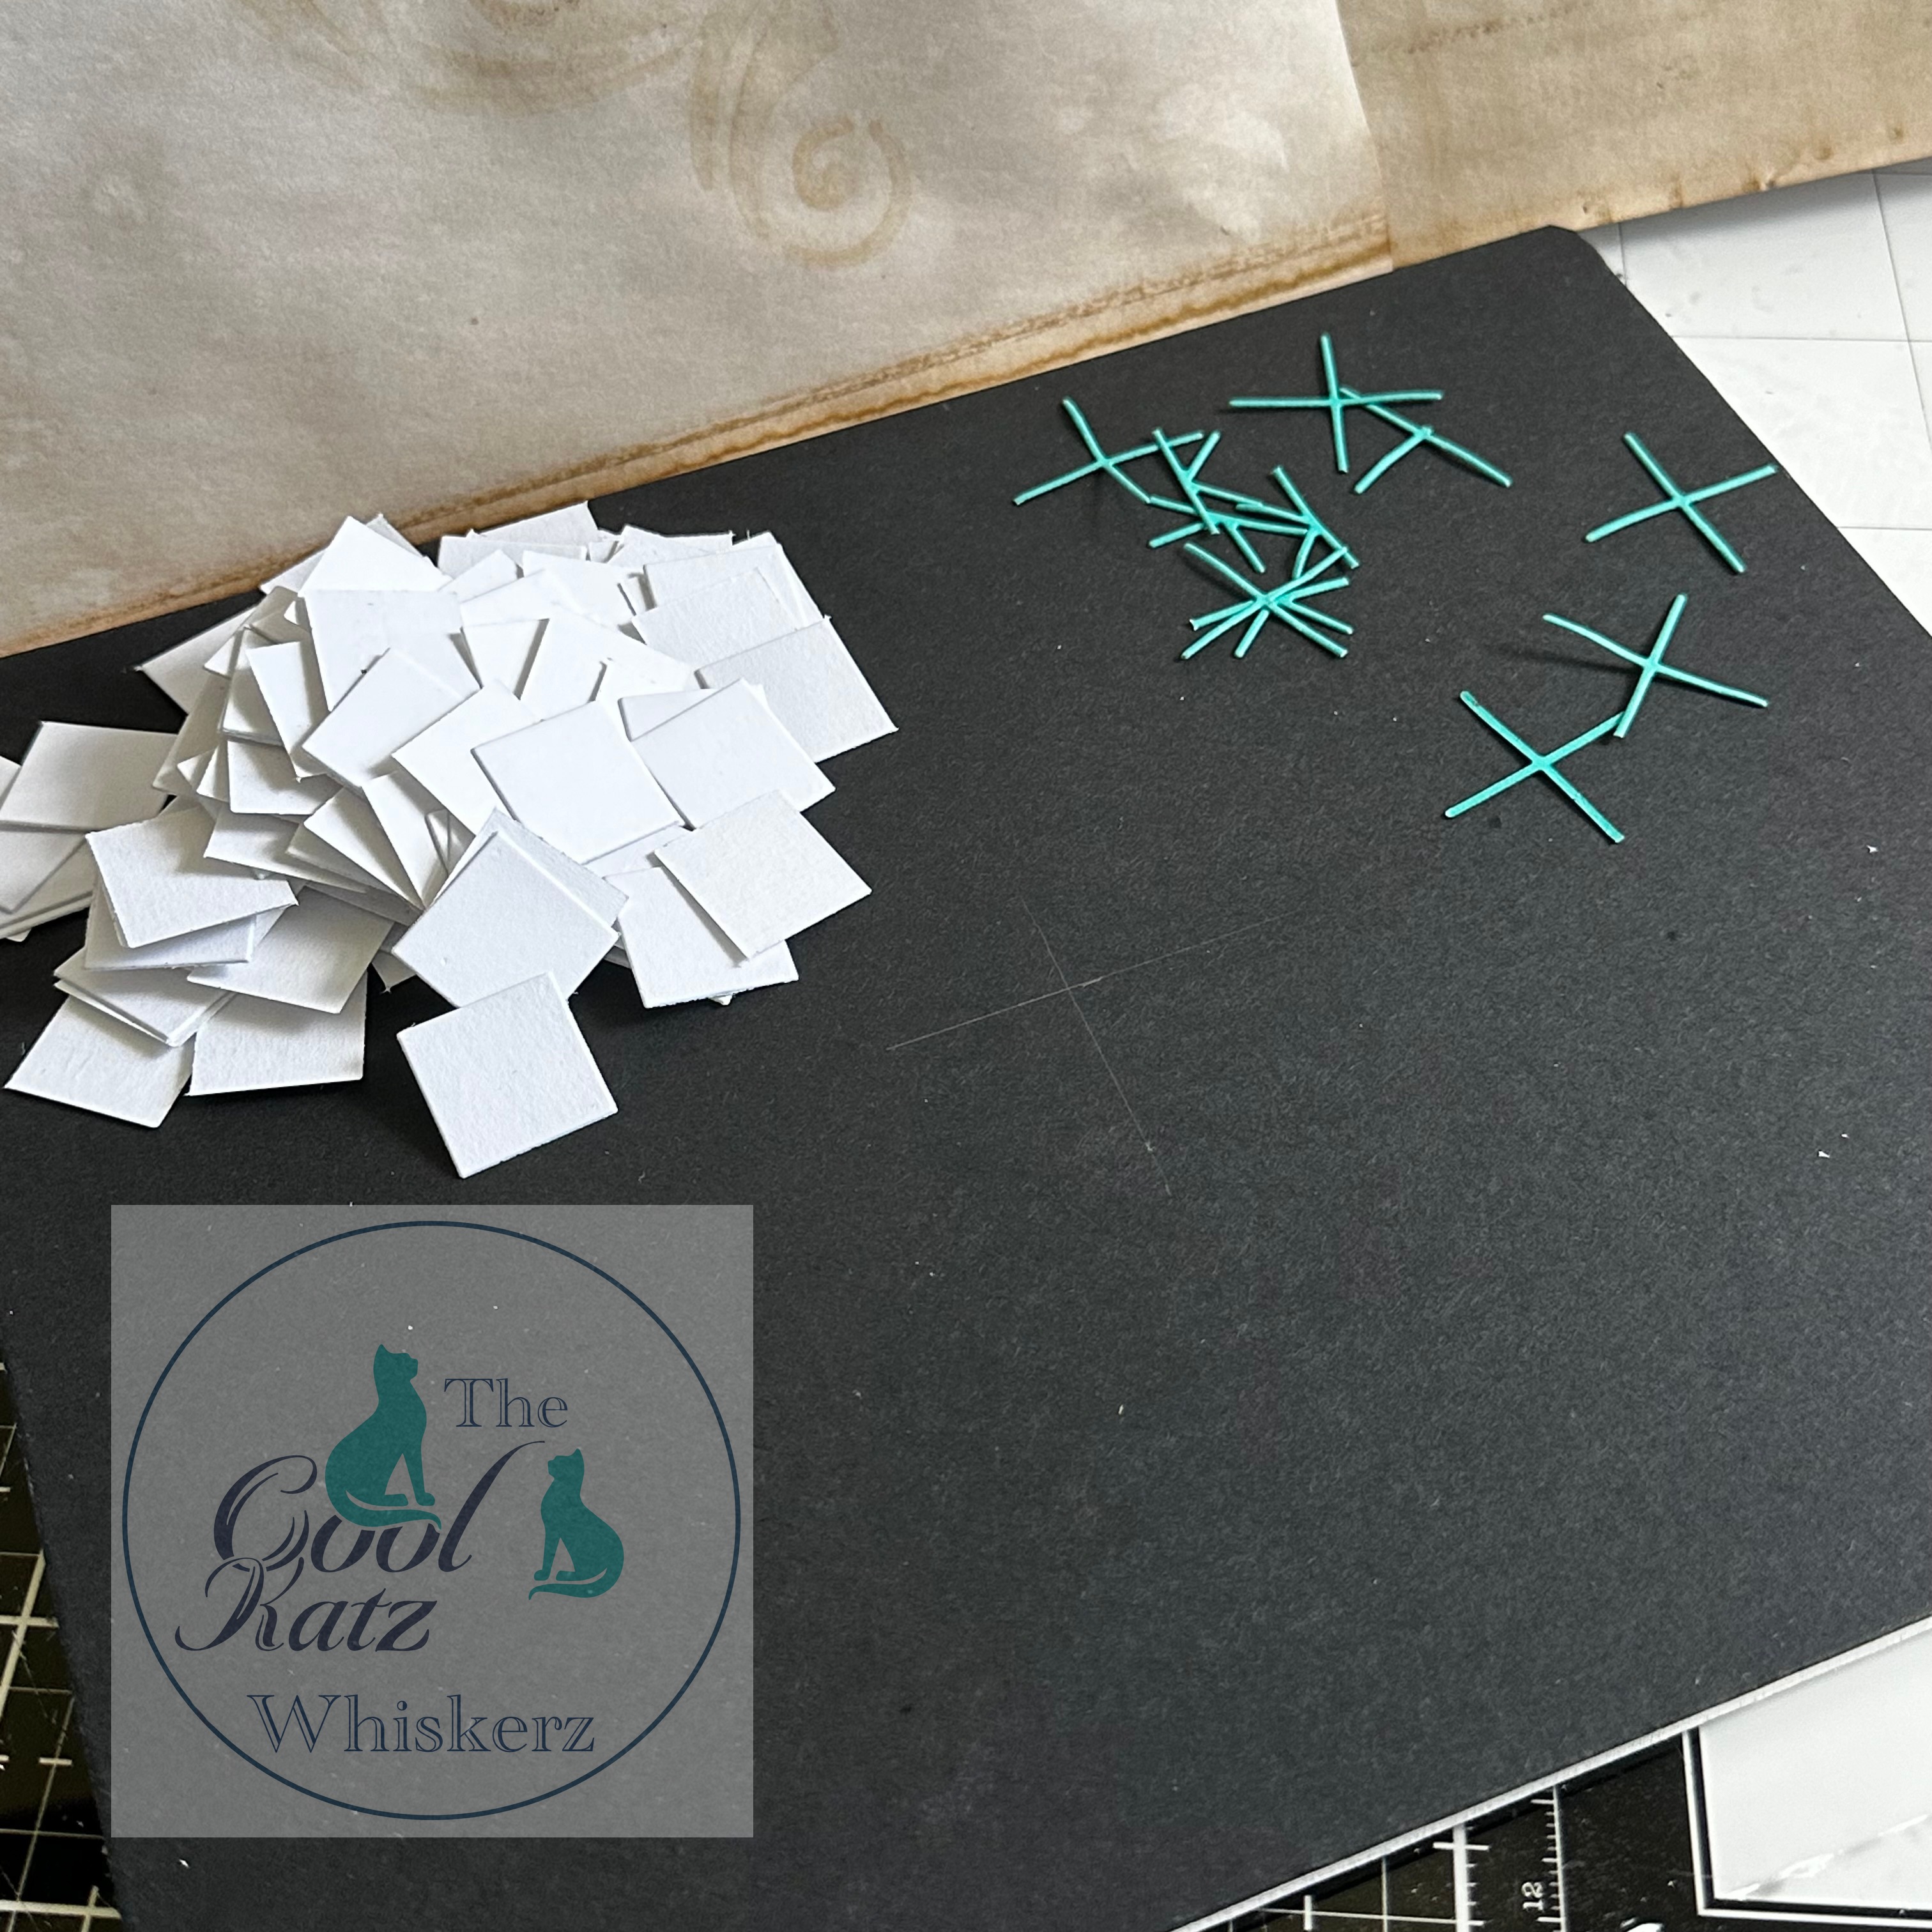
Once you’ve decided on your colour scheme grab your lightweight card and get die cutting. Make sure you have enough of the colours you need, and also card for the spacers to use in-between the tiles. I find it easier to choose a different colour for these so they stand out and you can easily find them.
Then I pop some music on or my favourite YouTube channel and get die cutting!
For the 1/12th kitchen floor I covered the base with black card stock, and re marked the centre in pencil. The pencil will be erased afterwards and the black will show through as the grout. The tiles will be predominately white with a pattern stamped over the top.
I wanted my tiles to form a diagonal pattern thankfully Kay has designed spacers to help, so the tiles can be laid in either a diagonal or squared pattern, genius. So, I lined up the spacer with the lines that I’d drawn across the centre of my floor beforehand, this made it so easy.
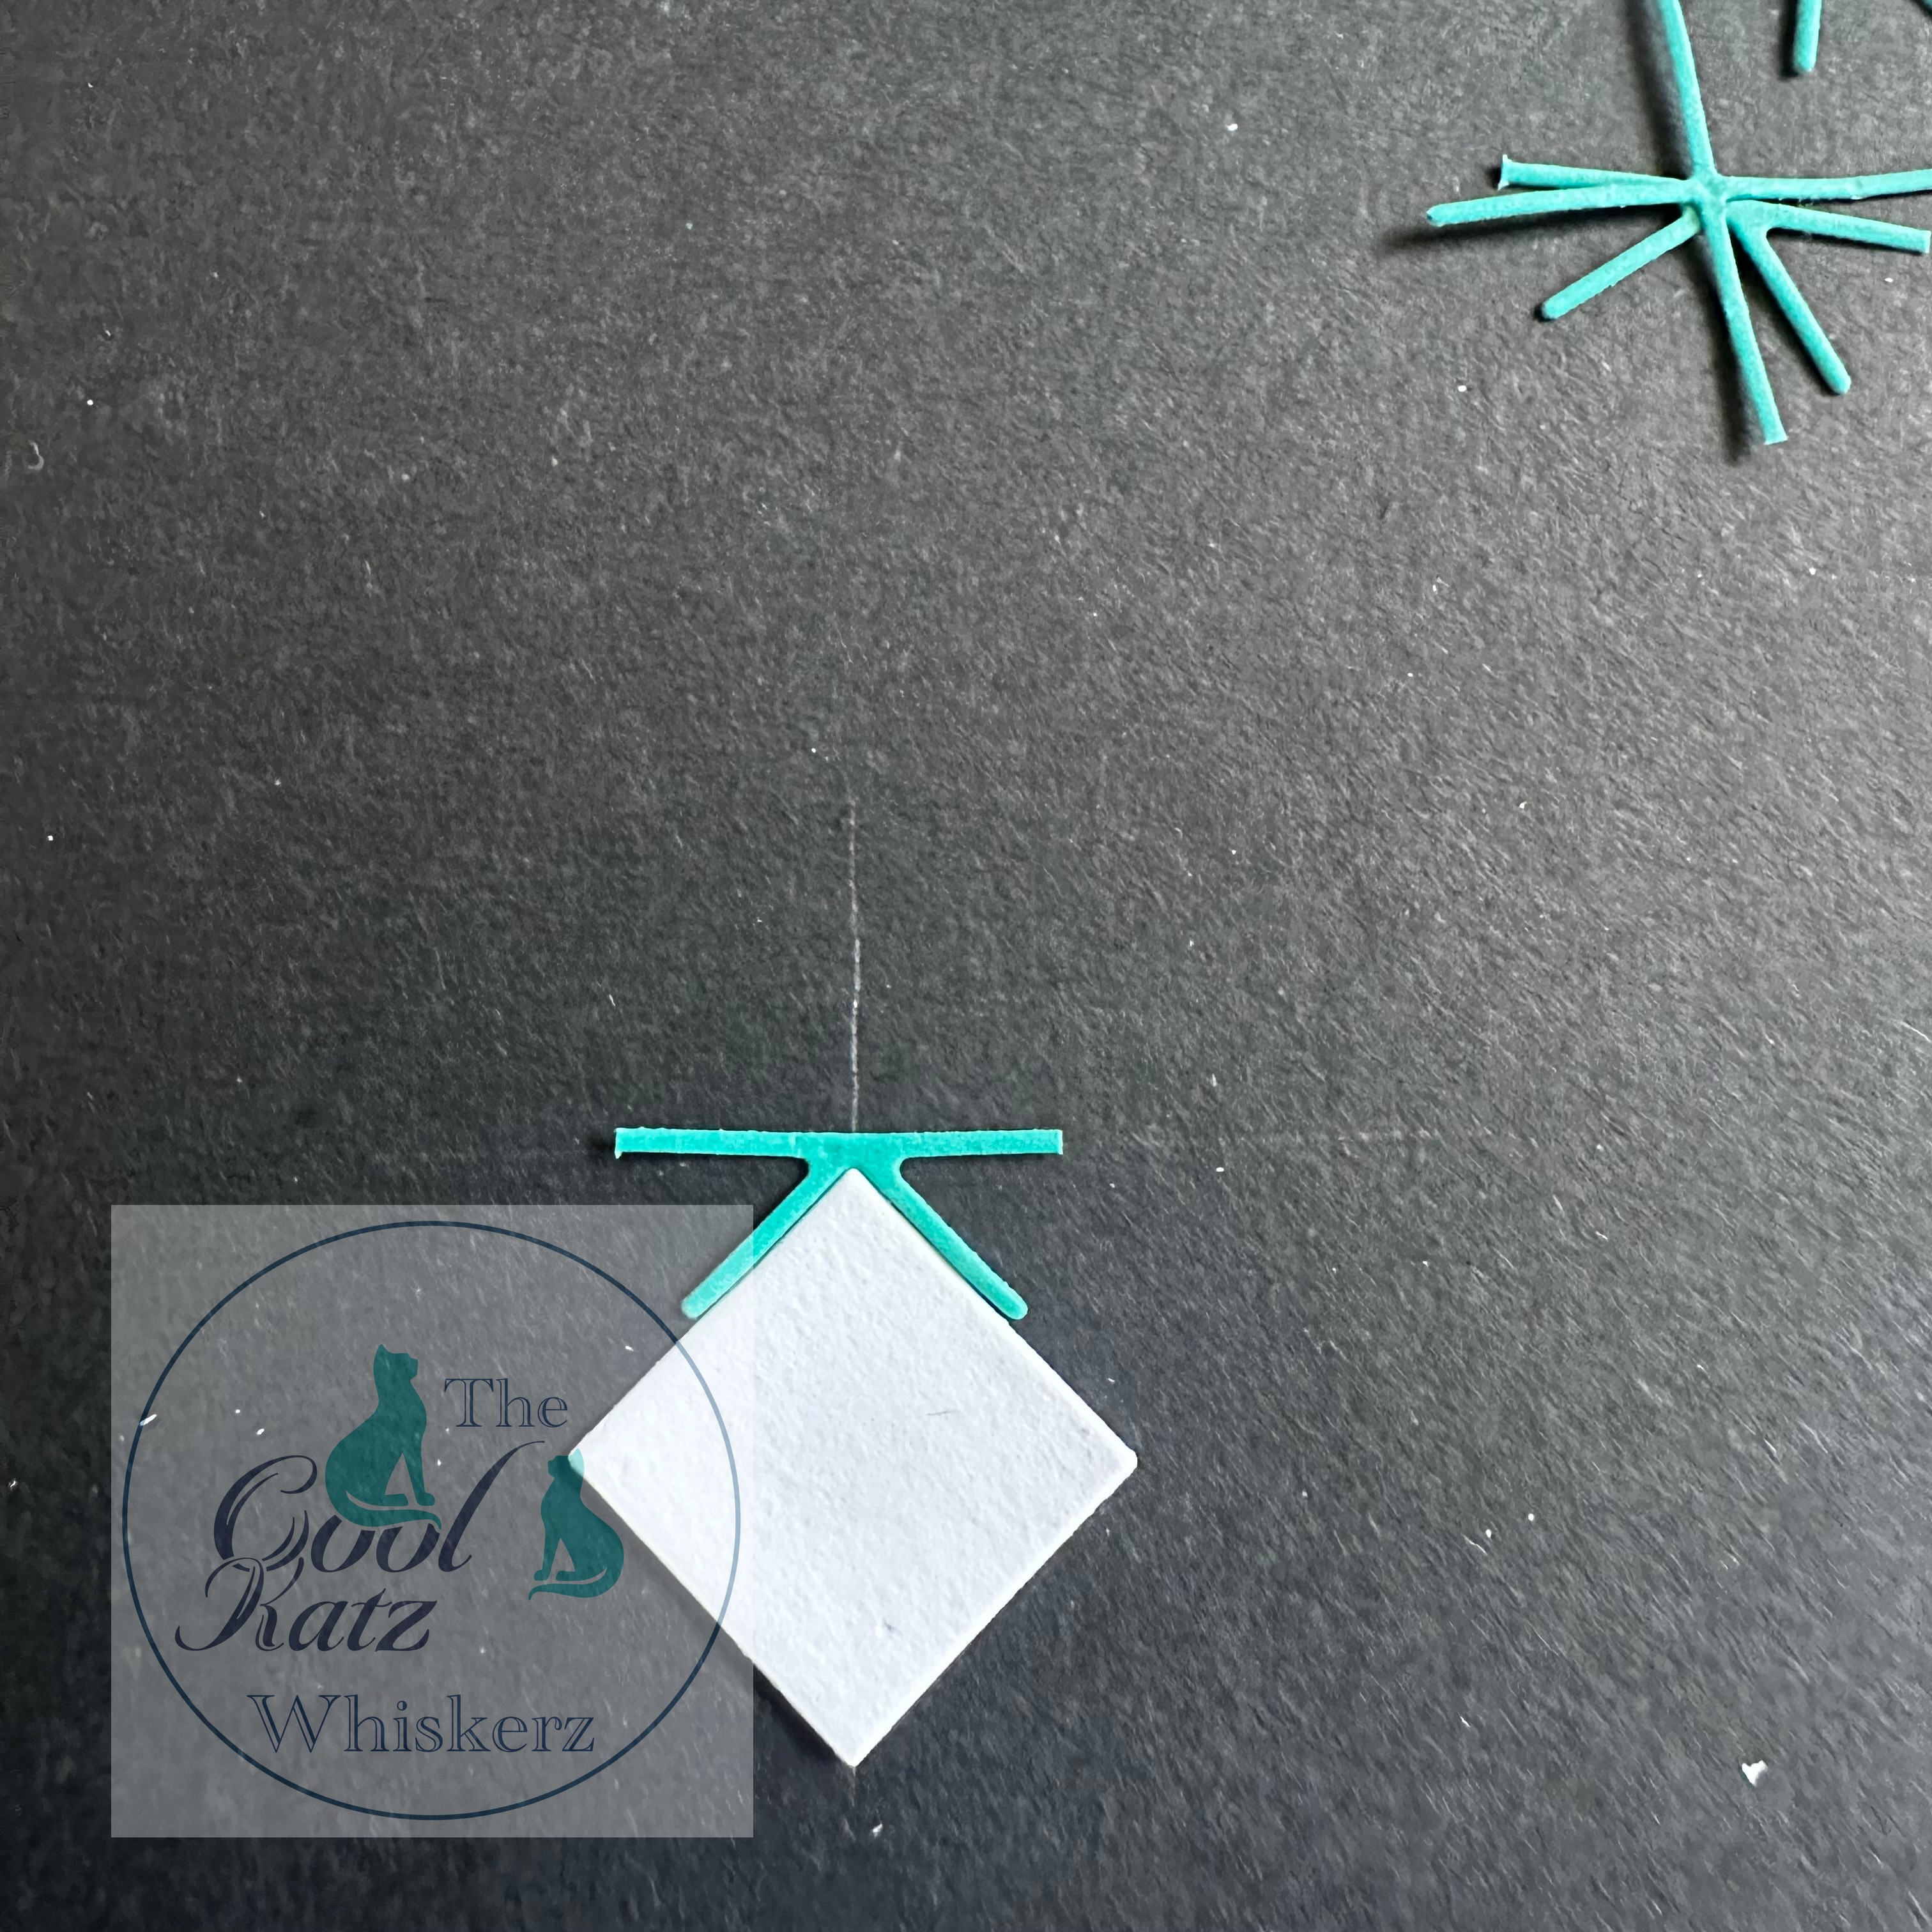
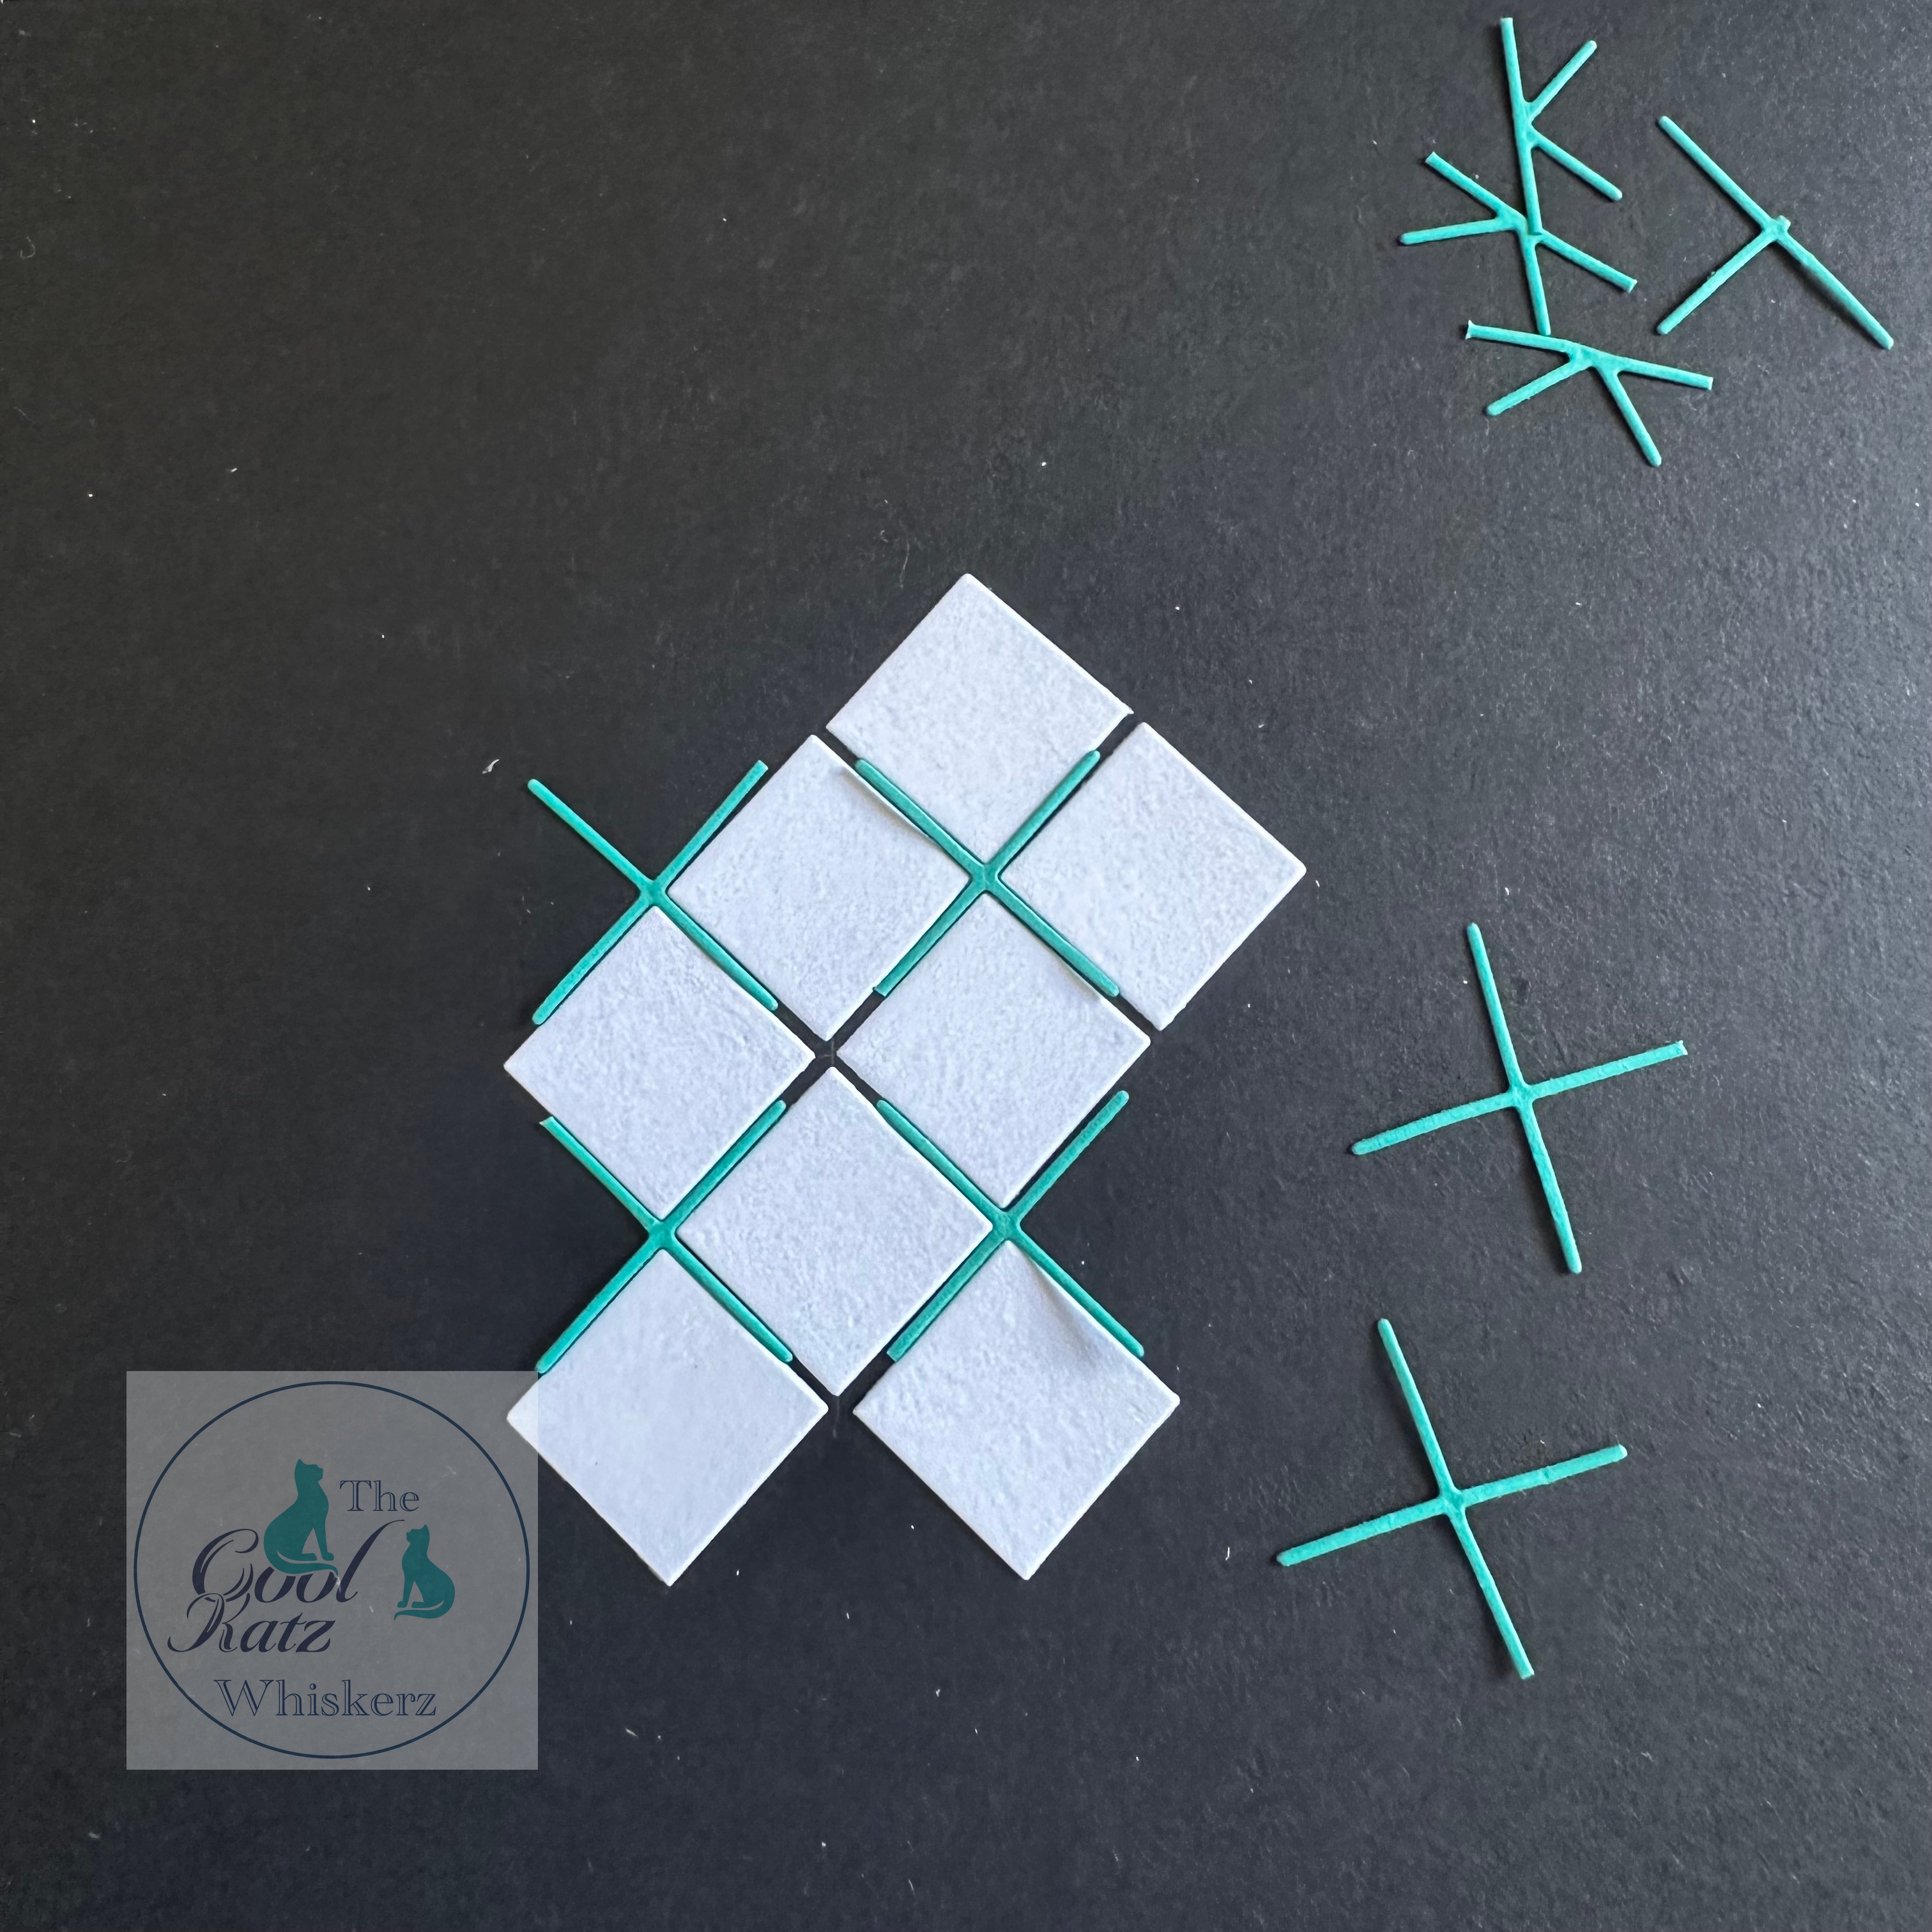
Carry on adding the tiles with the spacers placed in-between. Be careful not to get any glue on the spacers, then you can reuse them as you go along.
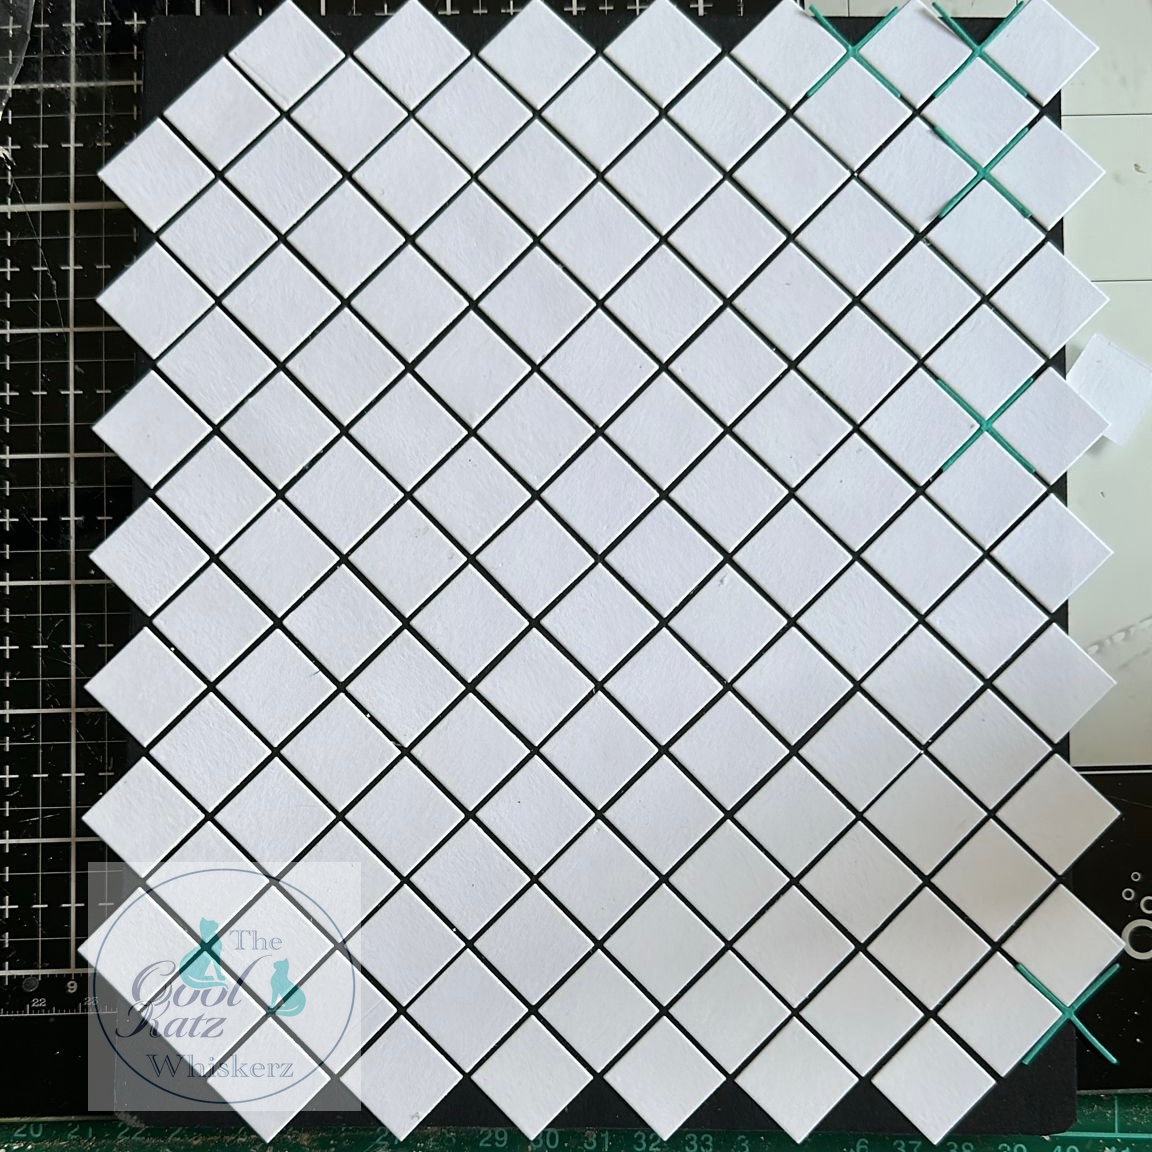
Take your time when adding the tiles, it will be well worth it in the end.
Once you get to the outer edges of the floor (and everything is completely dry) flip over the base and carefully trim away any overhanging tiles. Turn the floor the right way up and use the small triangles that you’ve just trimmed off to fill in any gaps around the edge of the floor. Again let it dry completely before flipping it over again and re trimming the edges. I like to gently go around the edge of the floor with my Teflon Tool to curve any sharp edges and create a curve to the outer tiles.
To create a vintage French style tiled floor, I used both the 1/12th and 1/24th sets of the CoolKatzPrintz stamps. These are clever little stamps designed to fit perfectly onto the miniature cards and envelope sets but guess what………...they work perfectly with the tiles as well. Using the Text Stamping Tool you can create multiple different designs with the stamps. I created a mock up floor and tested out a few designs and colours before deciding on how I wanted my floor to look.
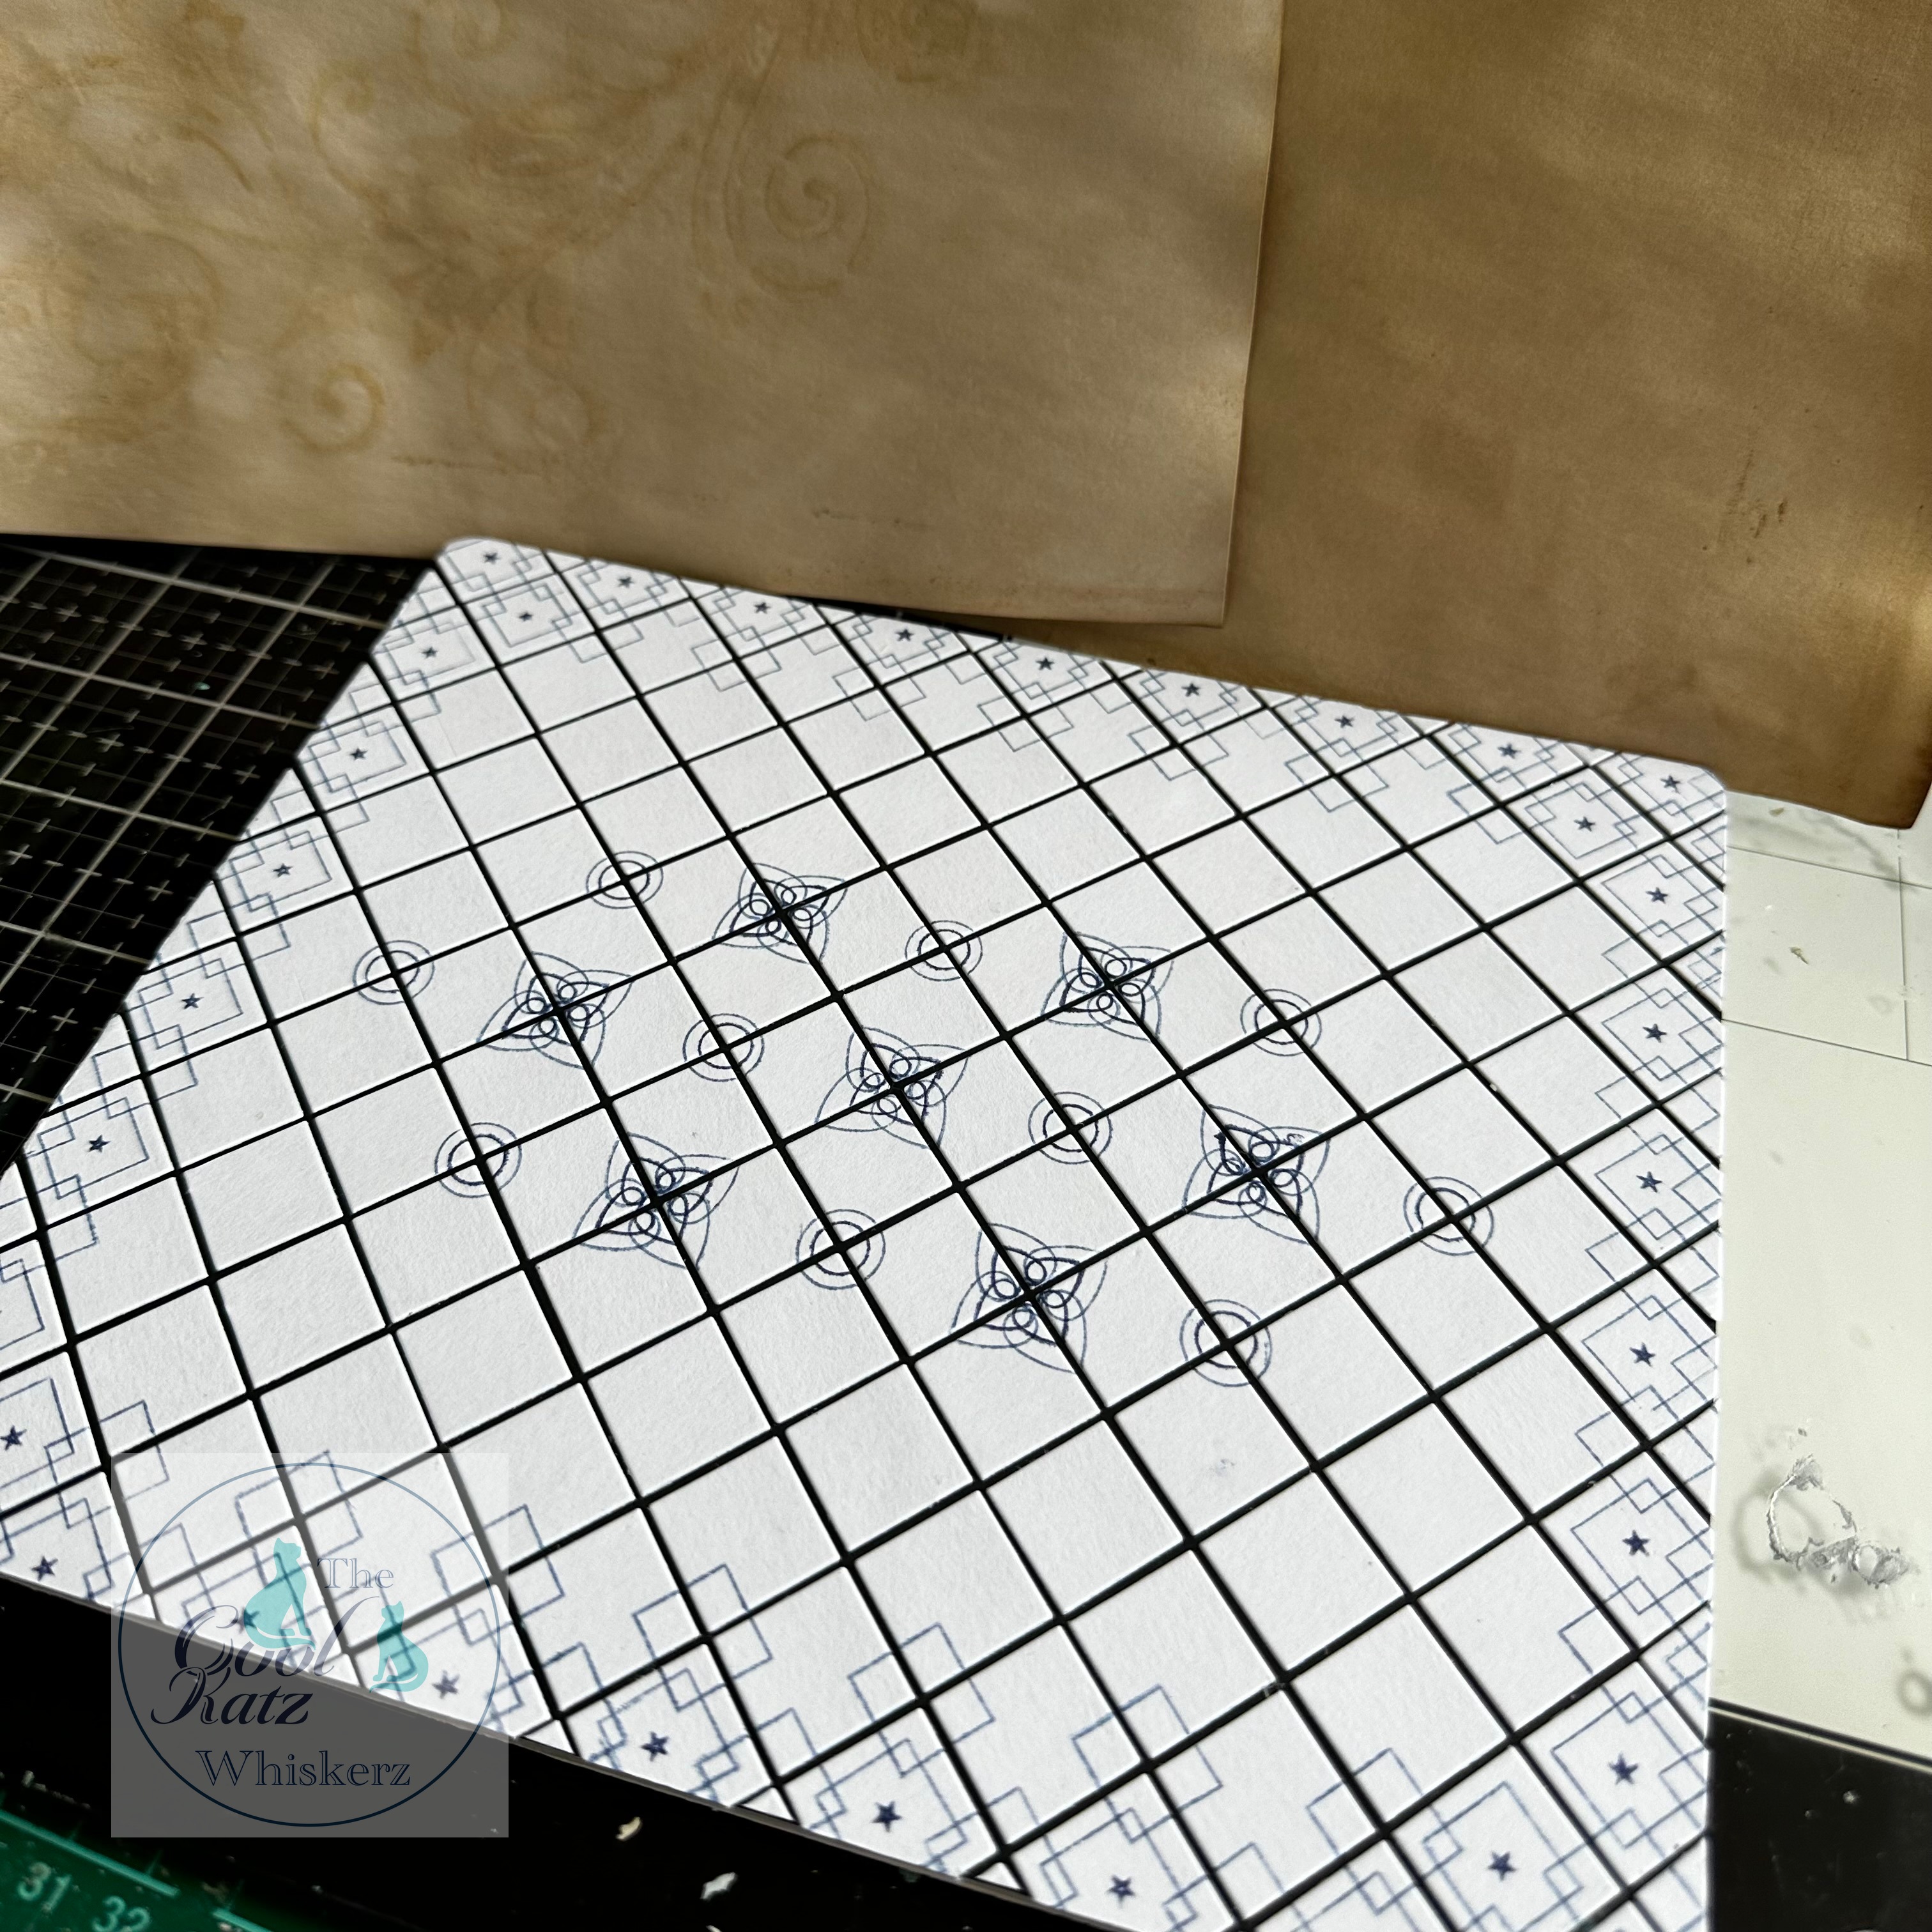
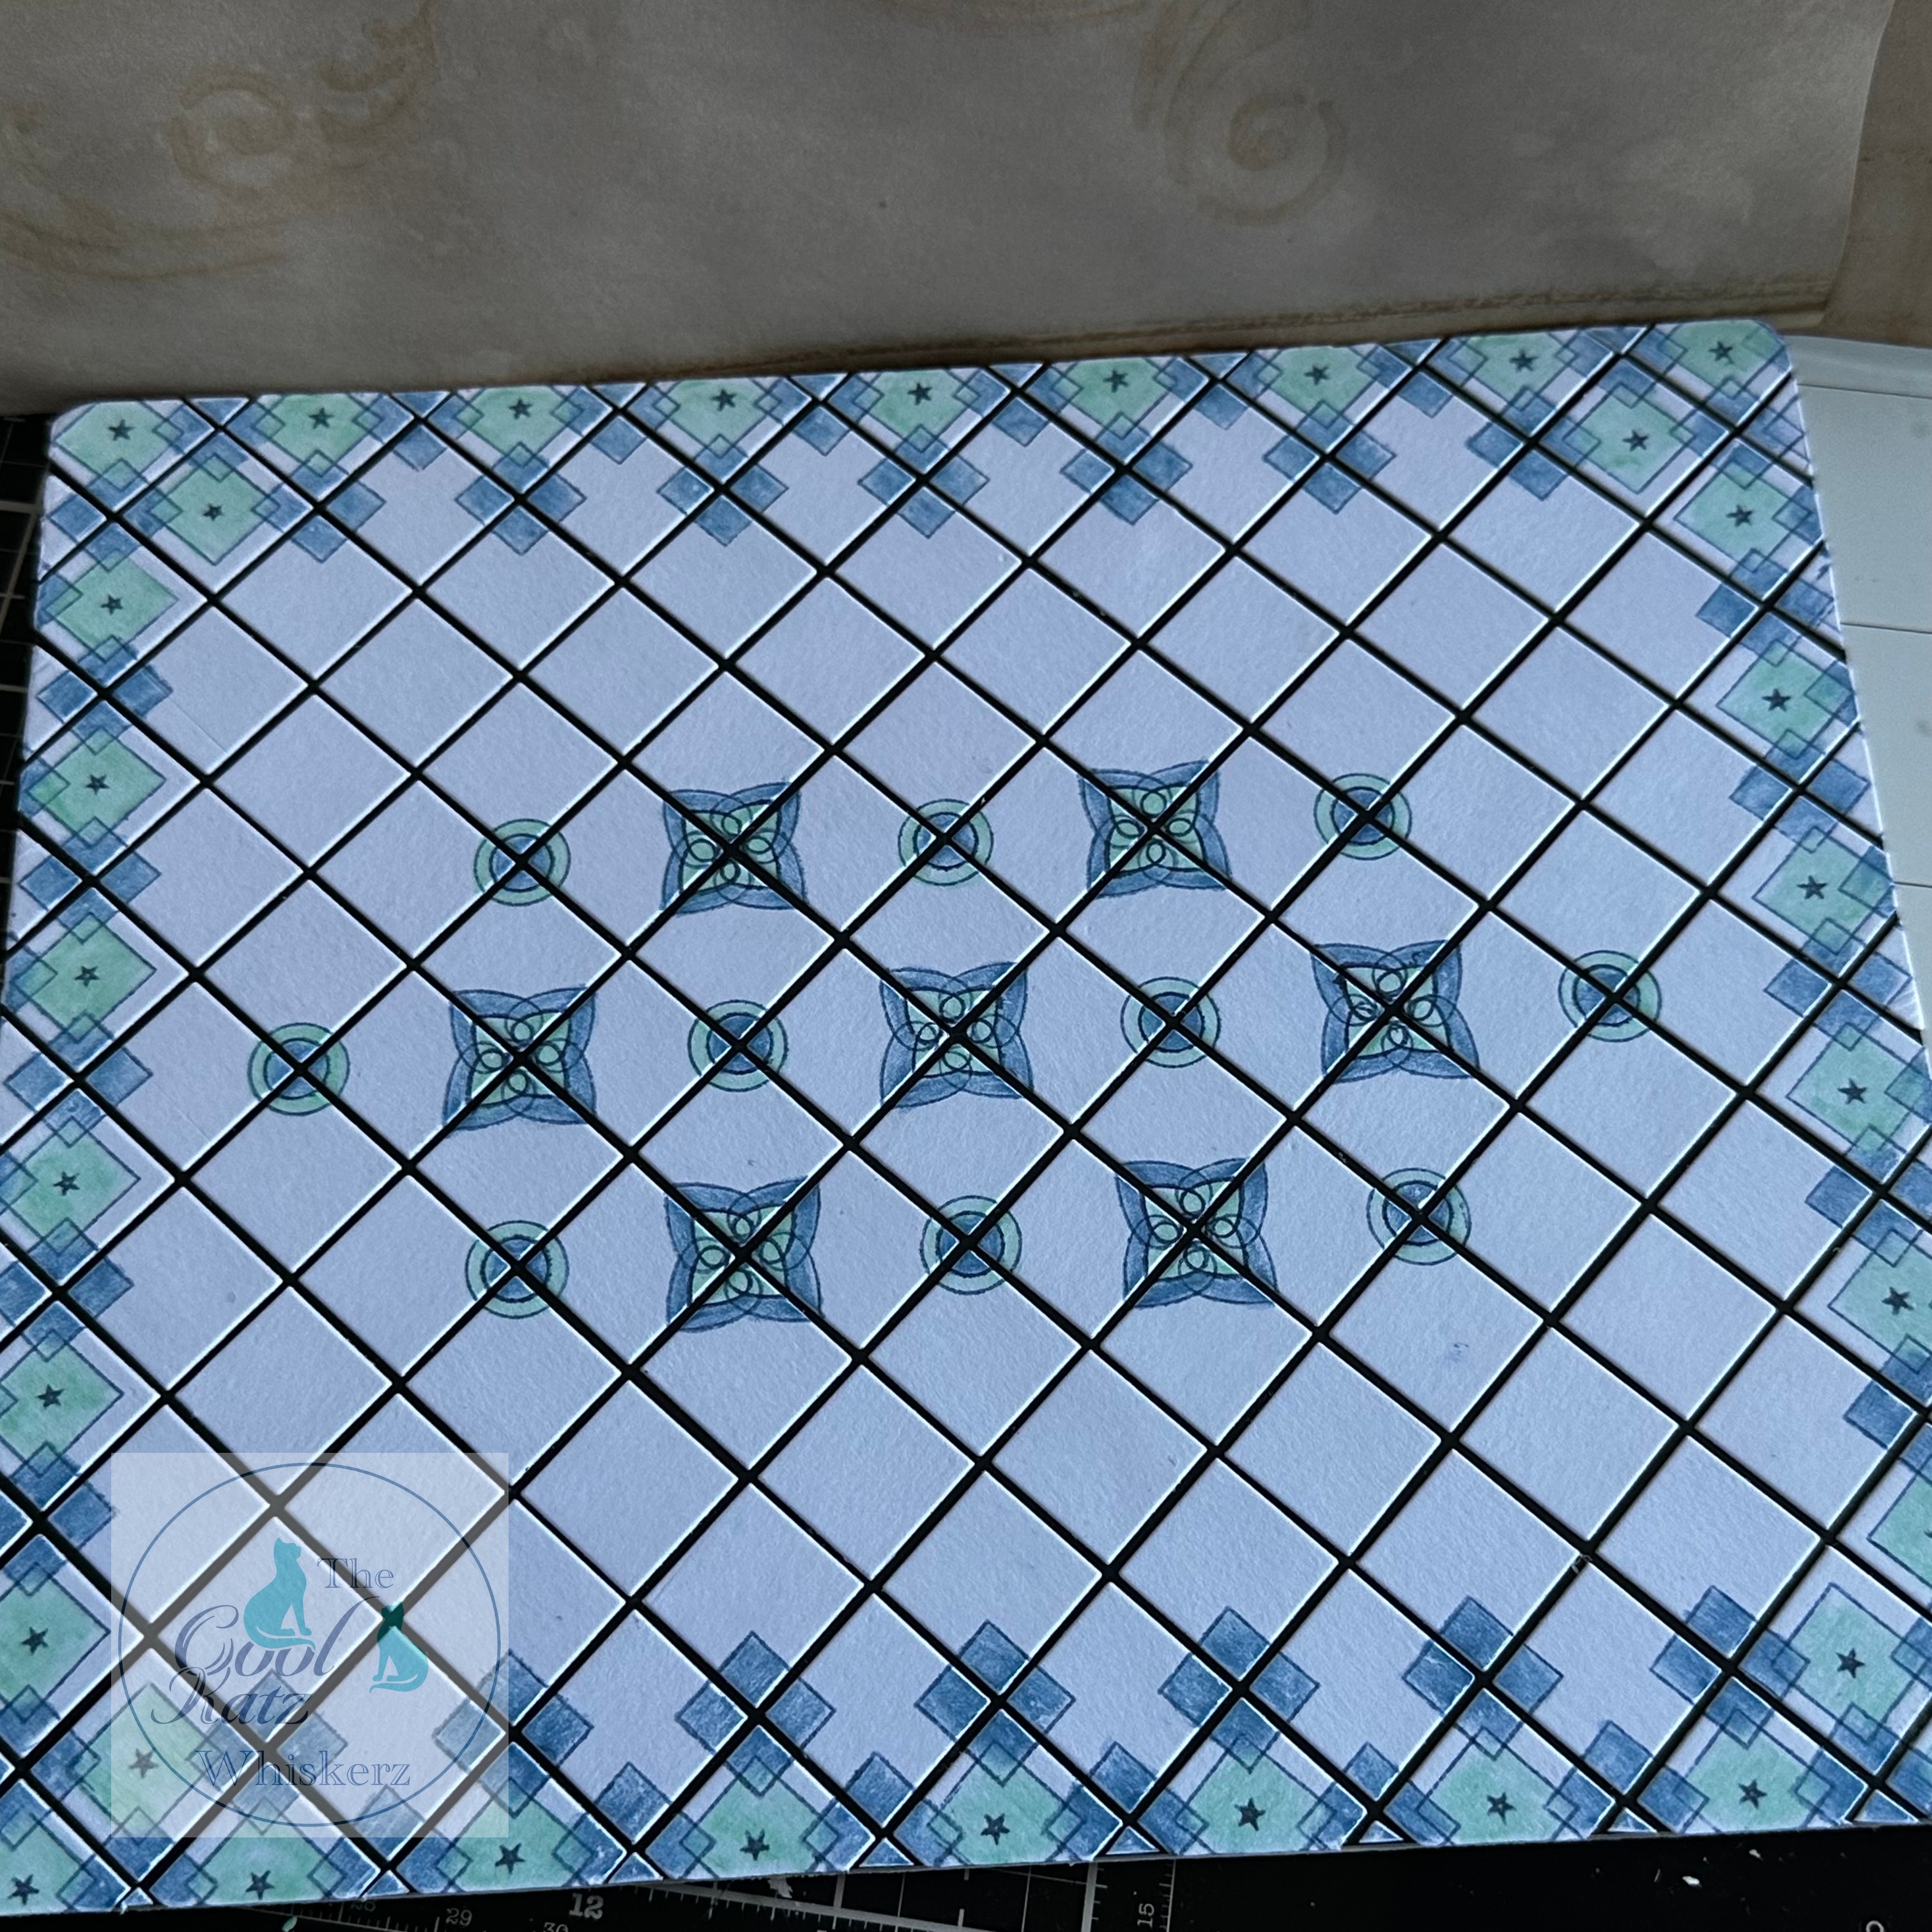
So I chose two shades of Distress Ink Chipped Sapphire and Faded Jeans and created a pattern around the edge of the floor using the square outer frame and the small star. After carefully making sure I’d found the centre of the floor, I added another design using a mixture of the two different sizes of heart and circle frame stamps. I love the finished effect of the tiled floor even before I added the colour to the tiles.
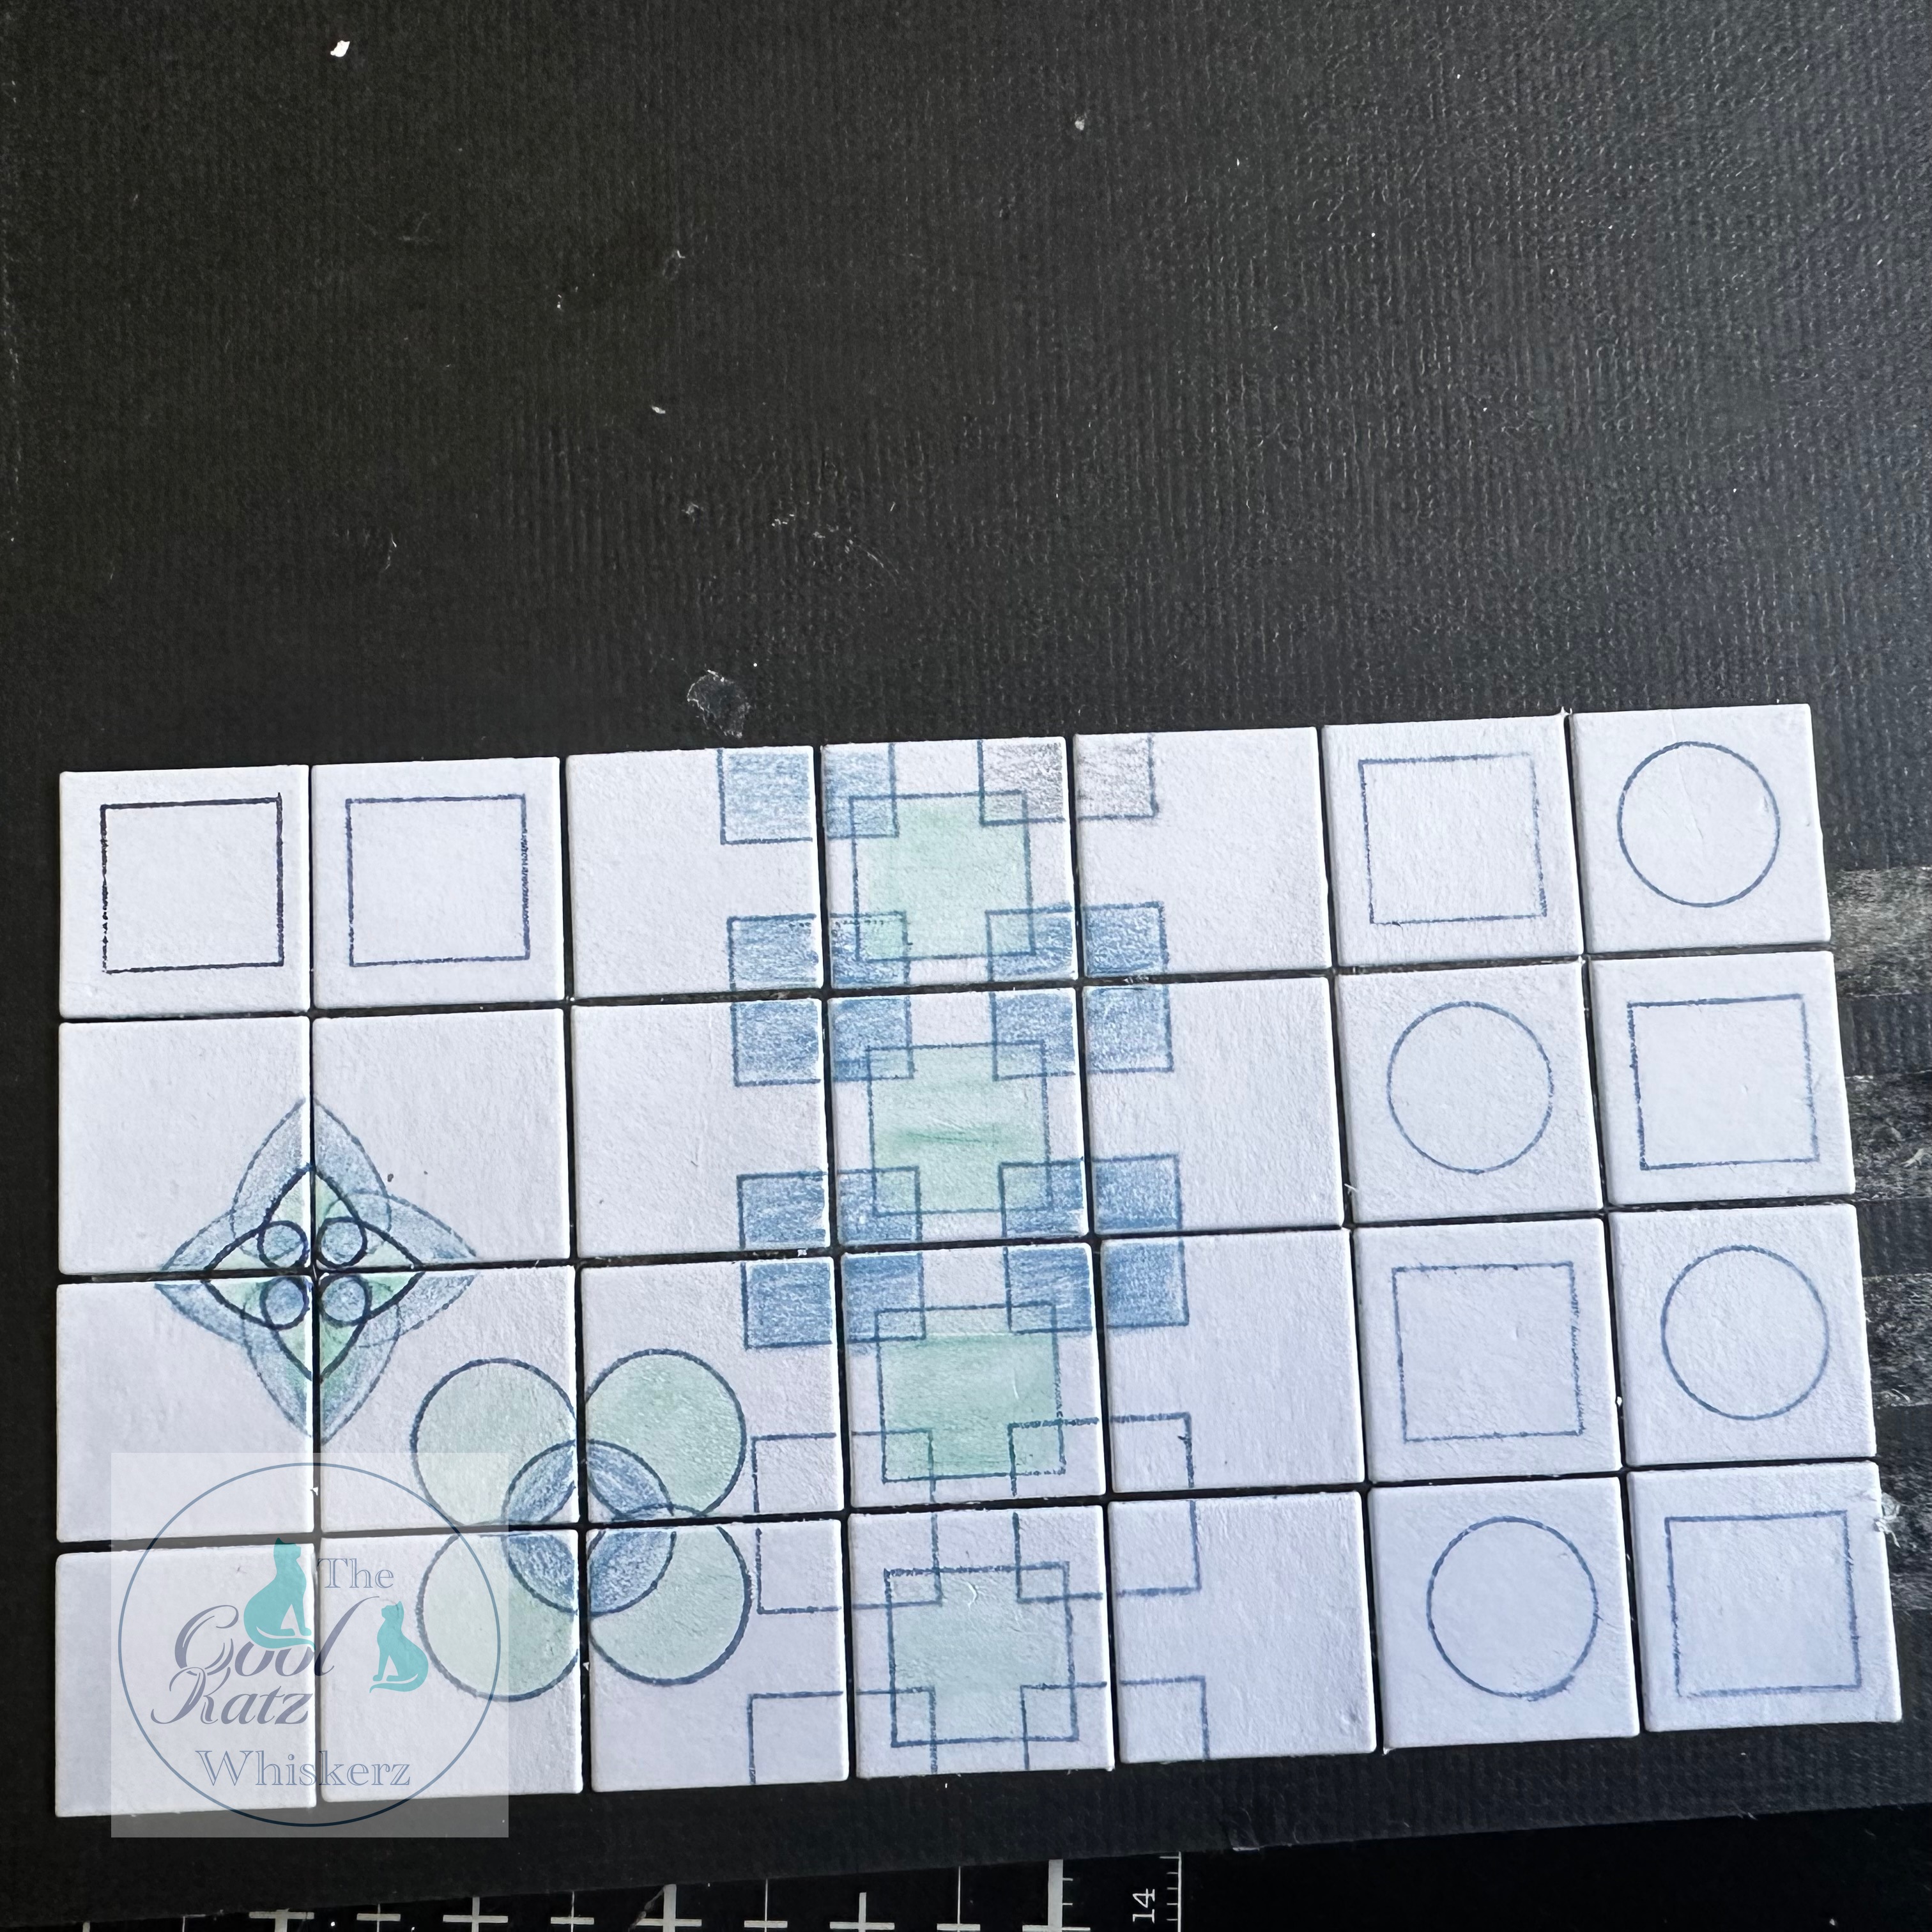
I chose two Caran d’Ache pencils Jade Green and Blue Jeans to add colour to the tiles and slowly worked to create a simple blue and green tiles design. It took a while to colour the tiles but I think it was worth it and I now have a totally unique design for my kitchen floor.
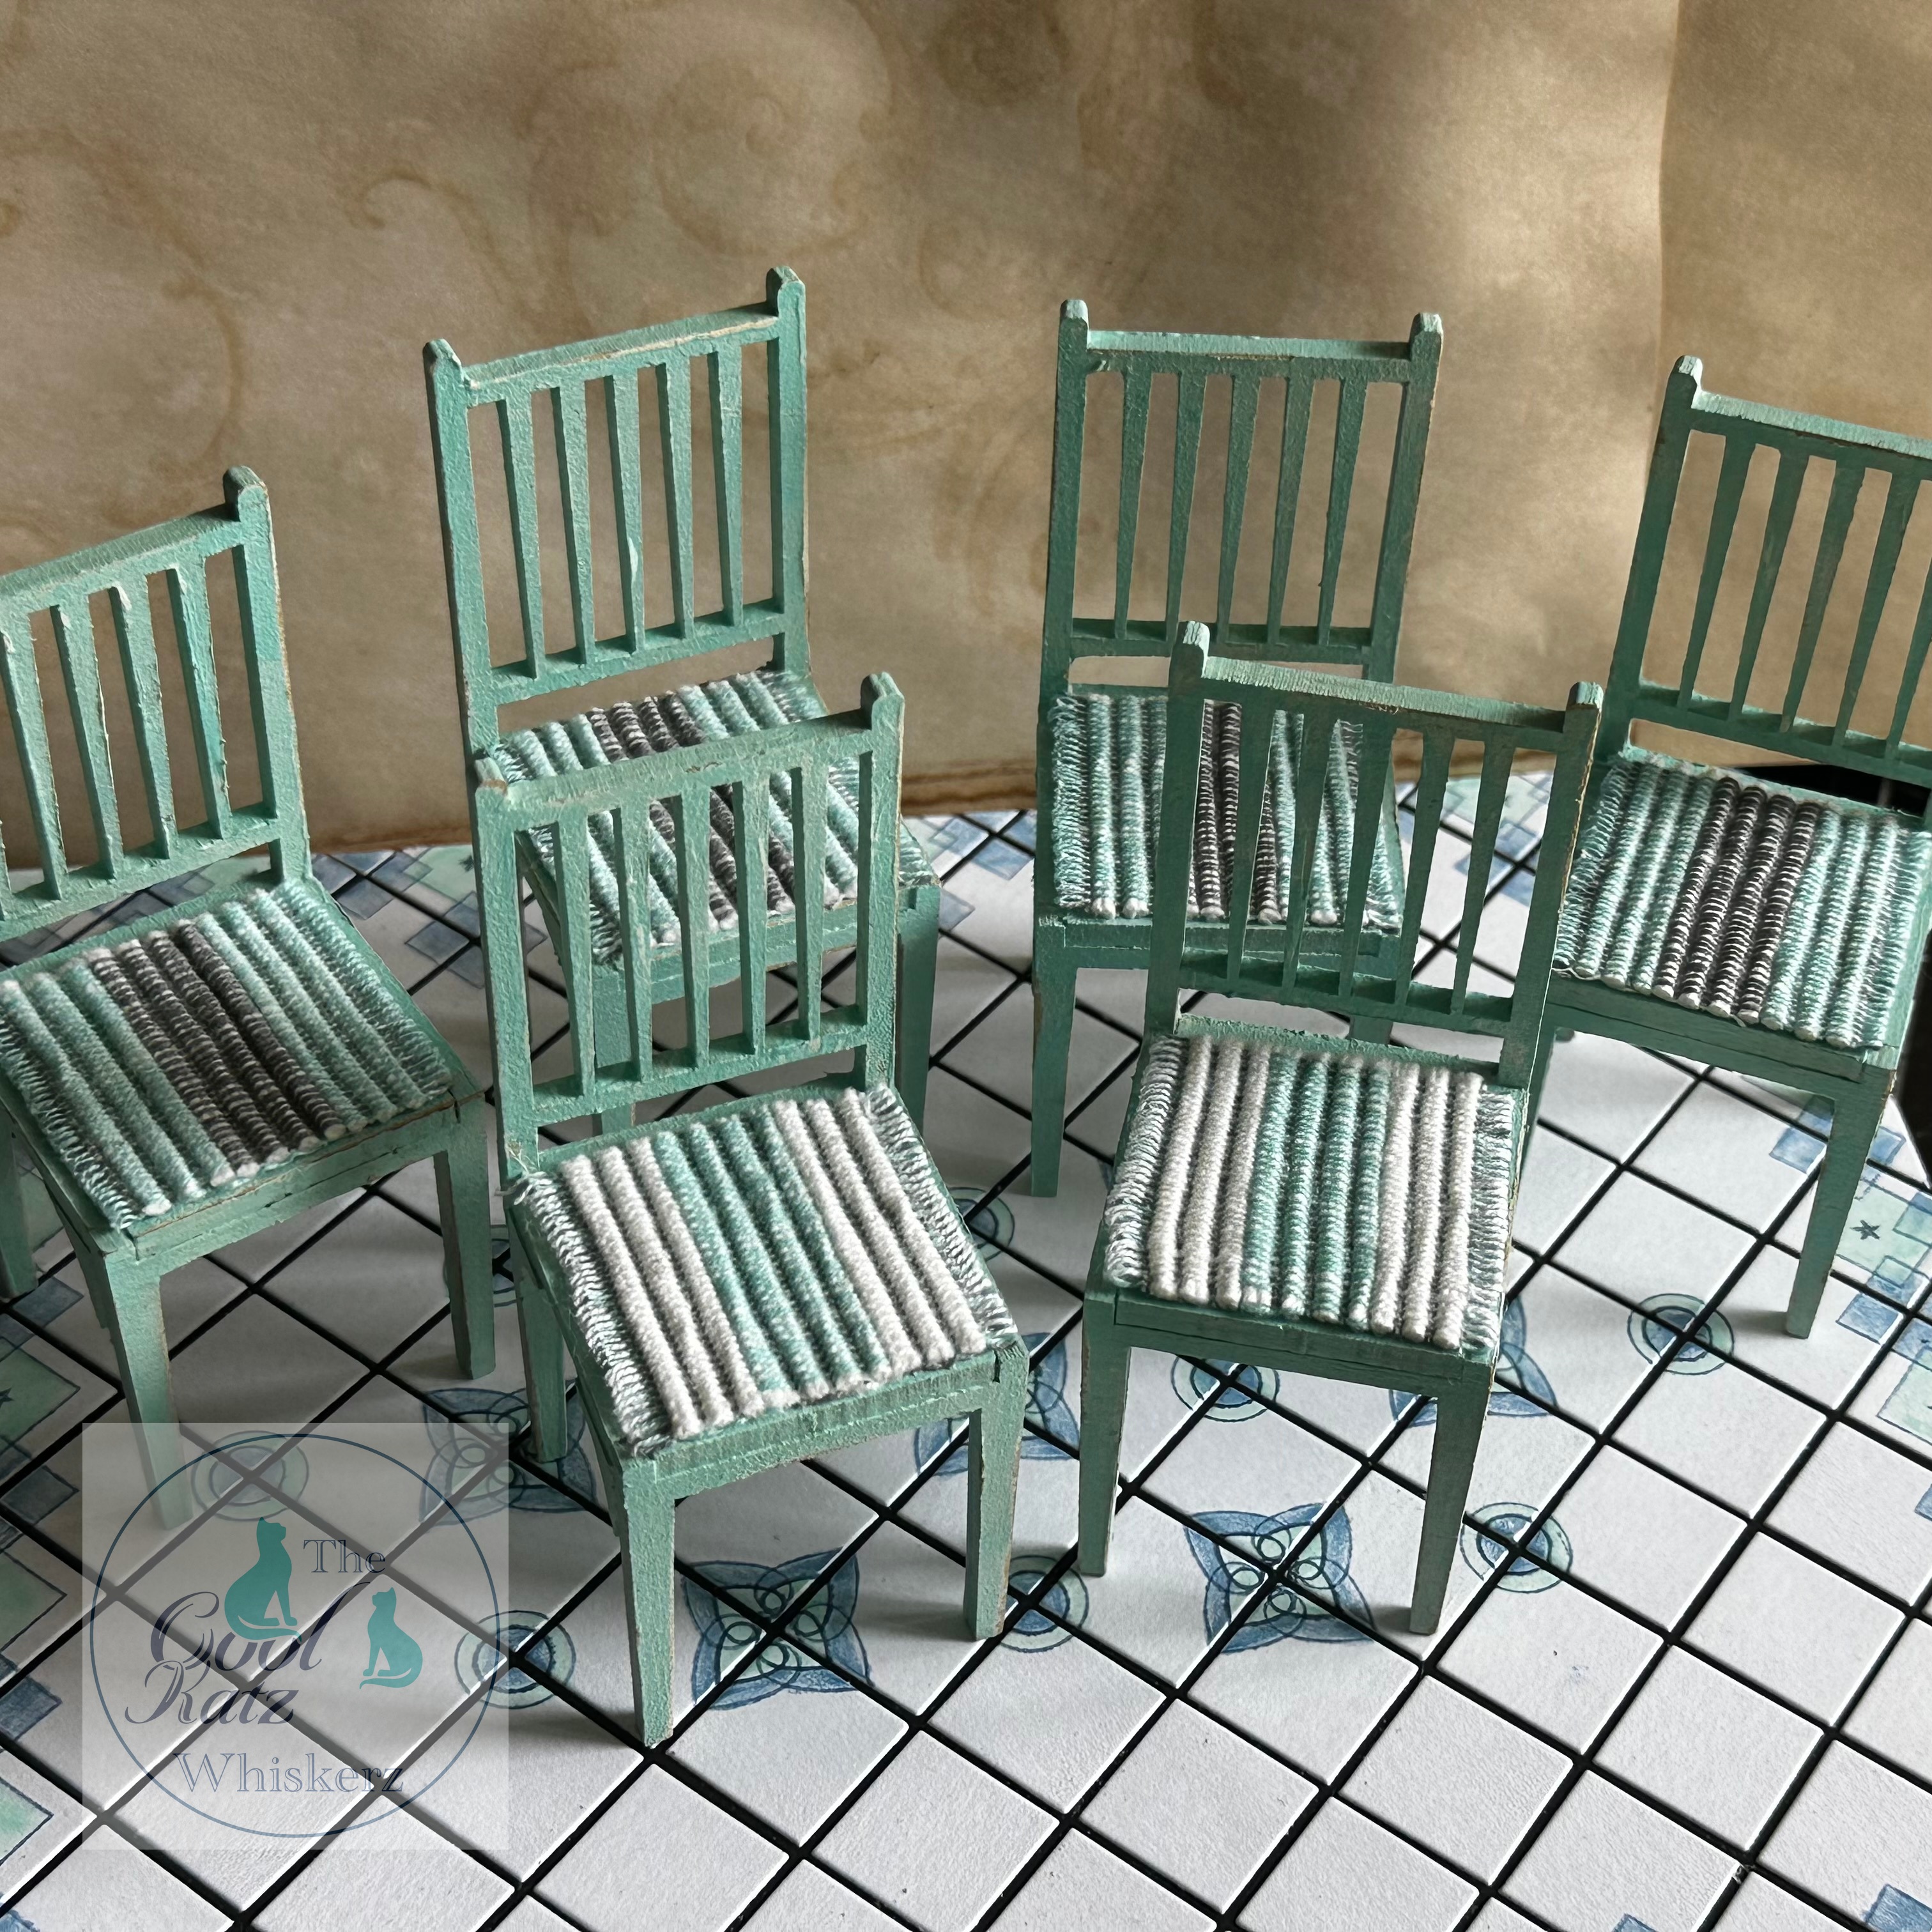
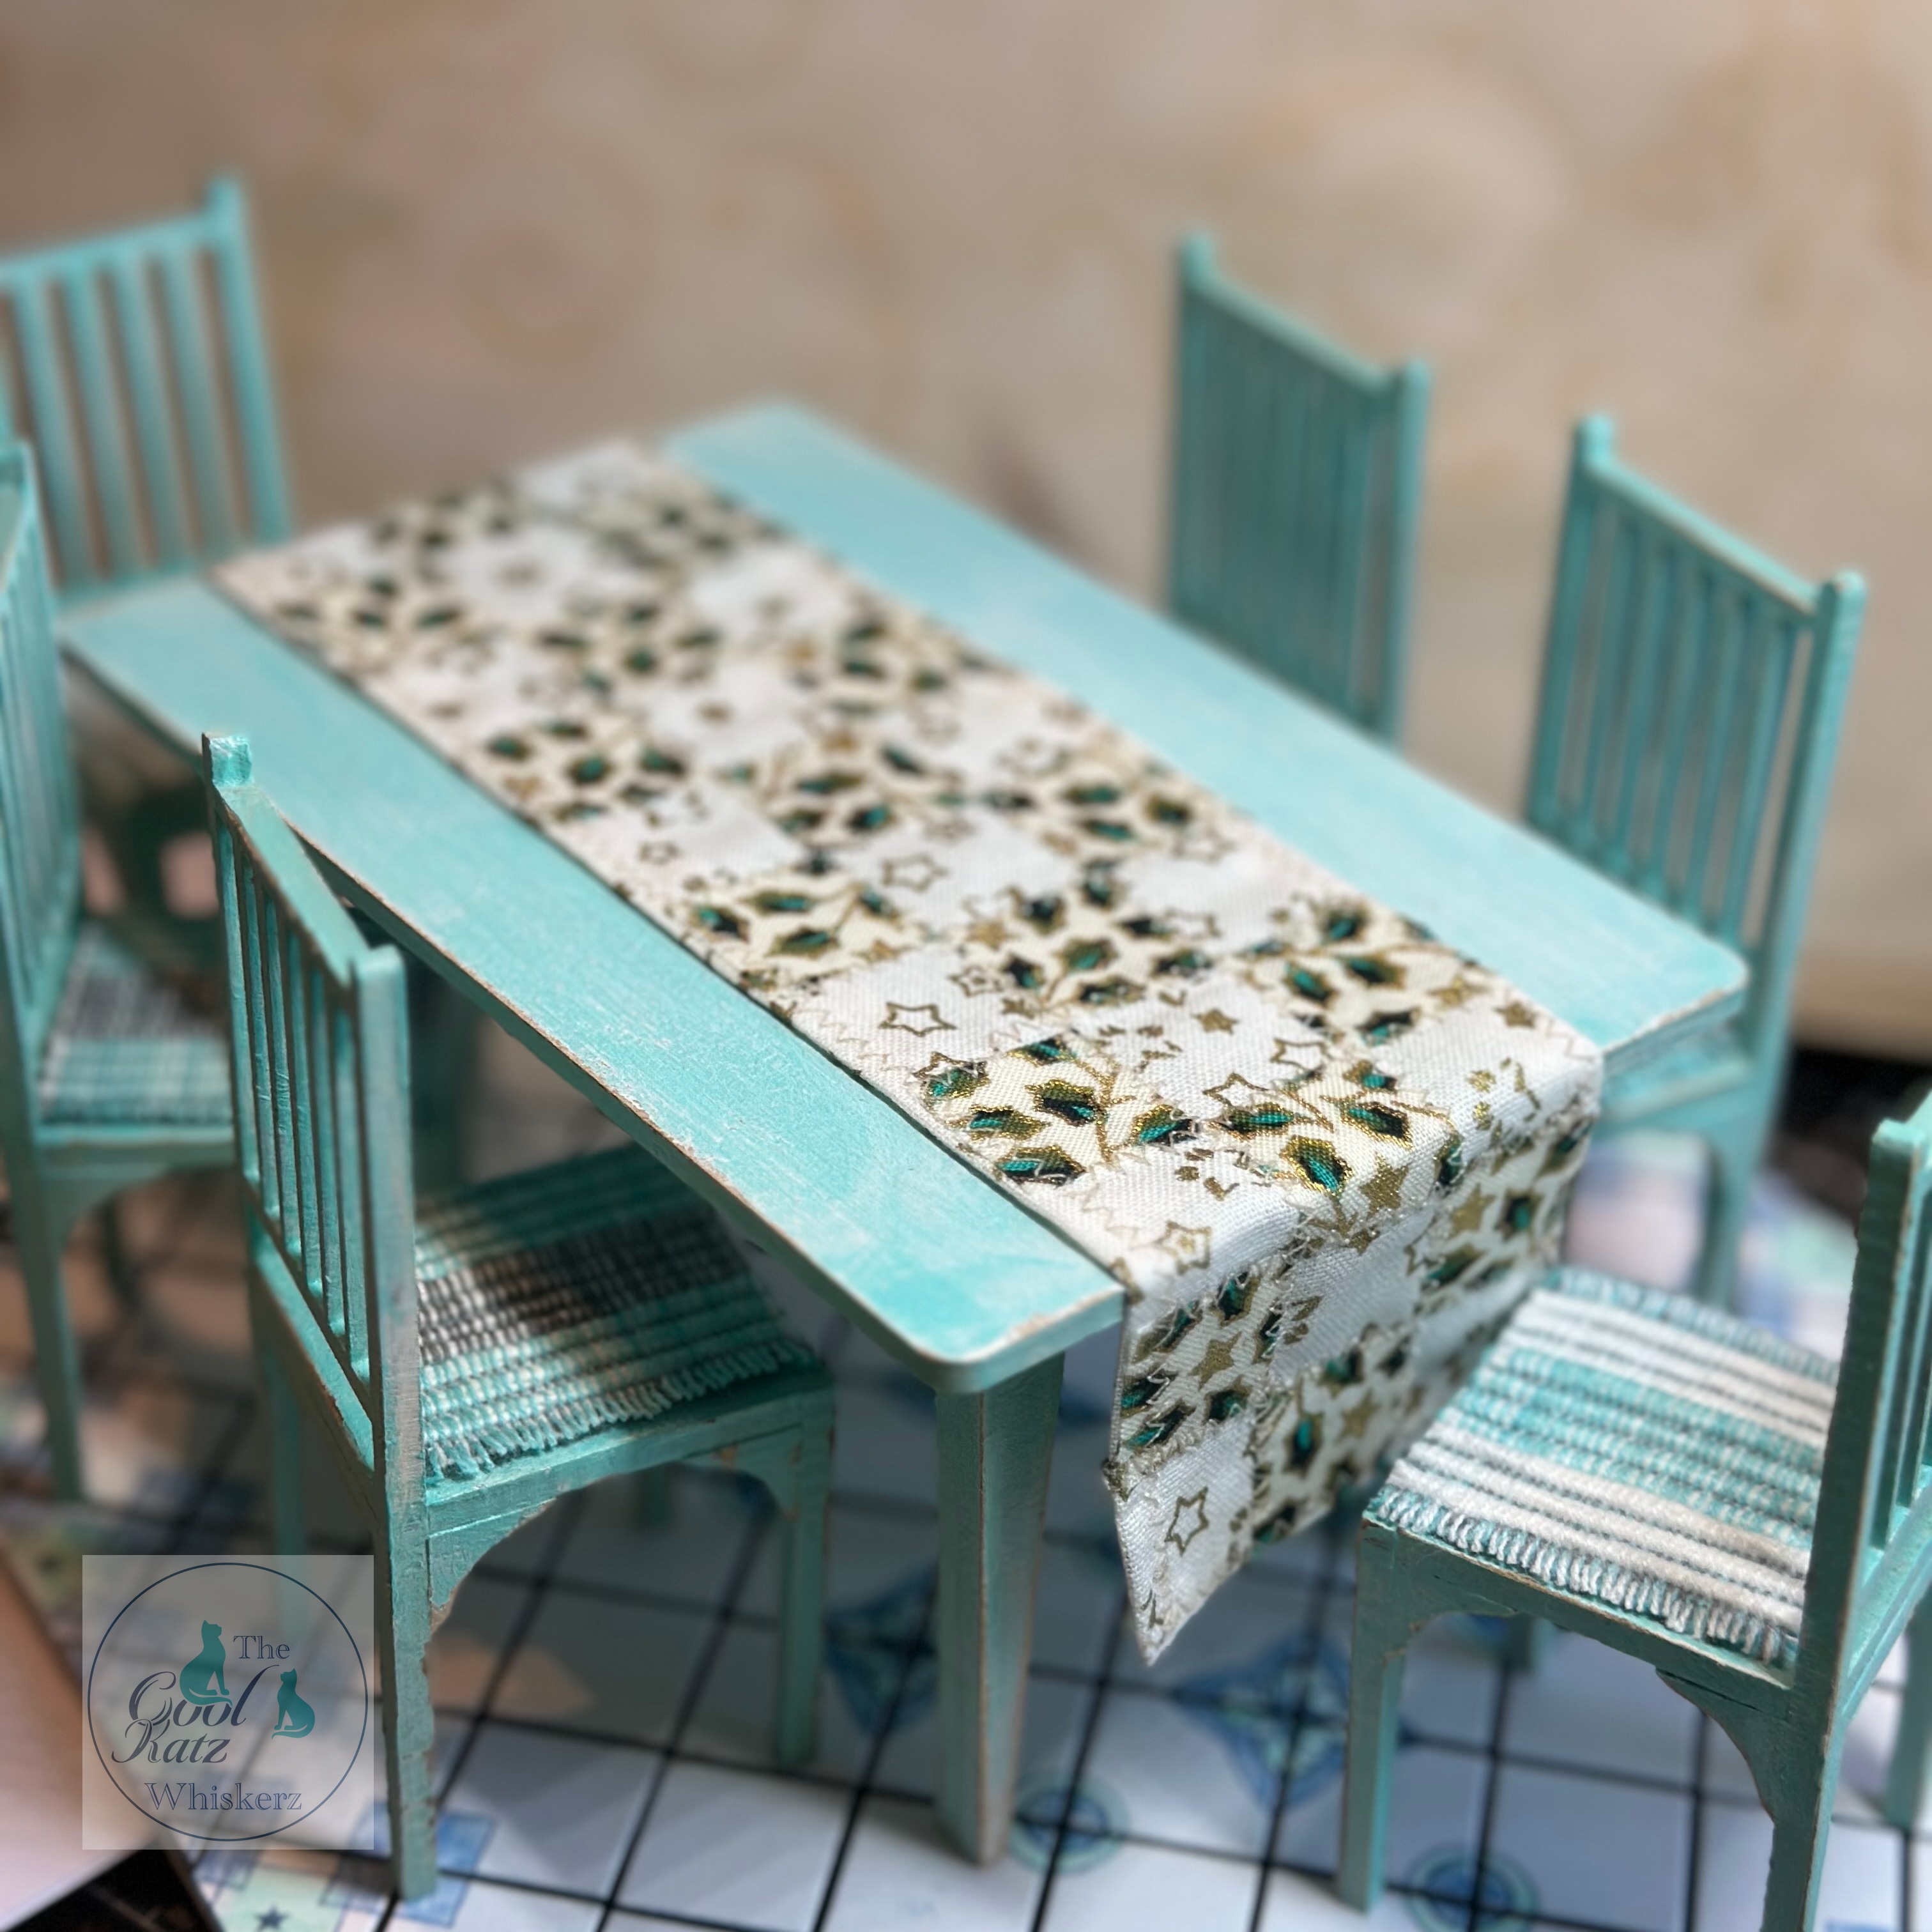
Now the floor is completed I went back to the table and chairs which were given a coat of gesso and left to dry. I gave them a light sanding, dusted them off with an old clean make up brush and gave them a coat of turquoise paint. In some area’s I made sure that some pain was thicker than other area’s. Once everything was completely dry, I gave everything another light sanding, working along any area’s that would naturally show wear and tear to create a loved and used shabby look.
I measured the seat area of the chair and found some stripey woven fabric in cream, grey and turquoise the perfect colours for my kitchen scheme. The fabric was a little thick to sew into miniature sized cushions so instead I opted to cut out the squares and glue them directly to the seat. I created two seat pads with the cream/turquoise and four with the turquoise/grey colour way.
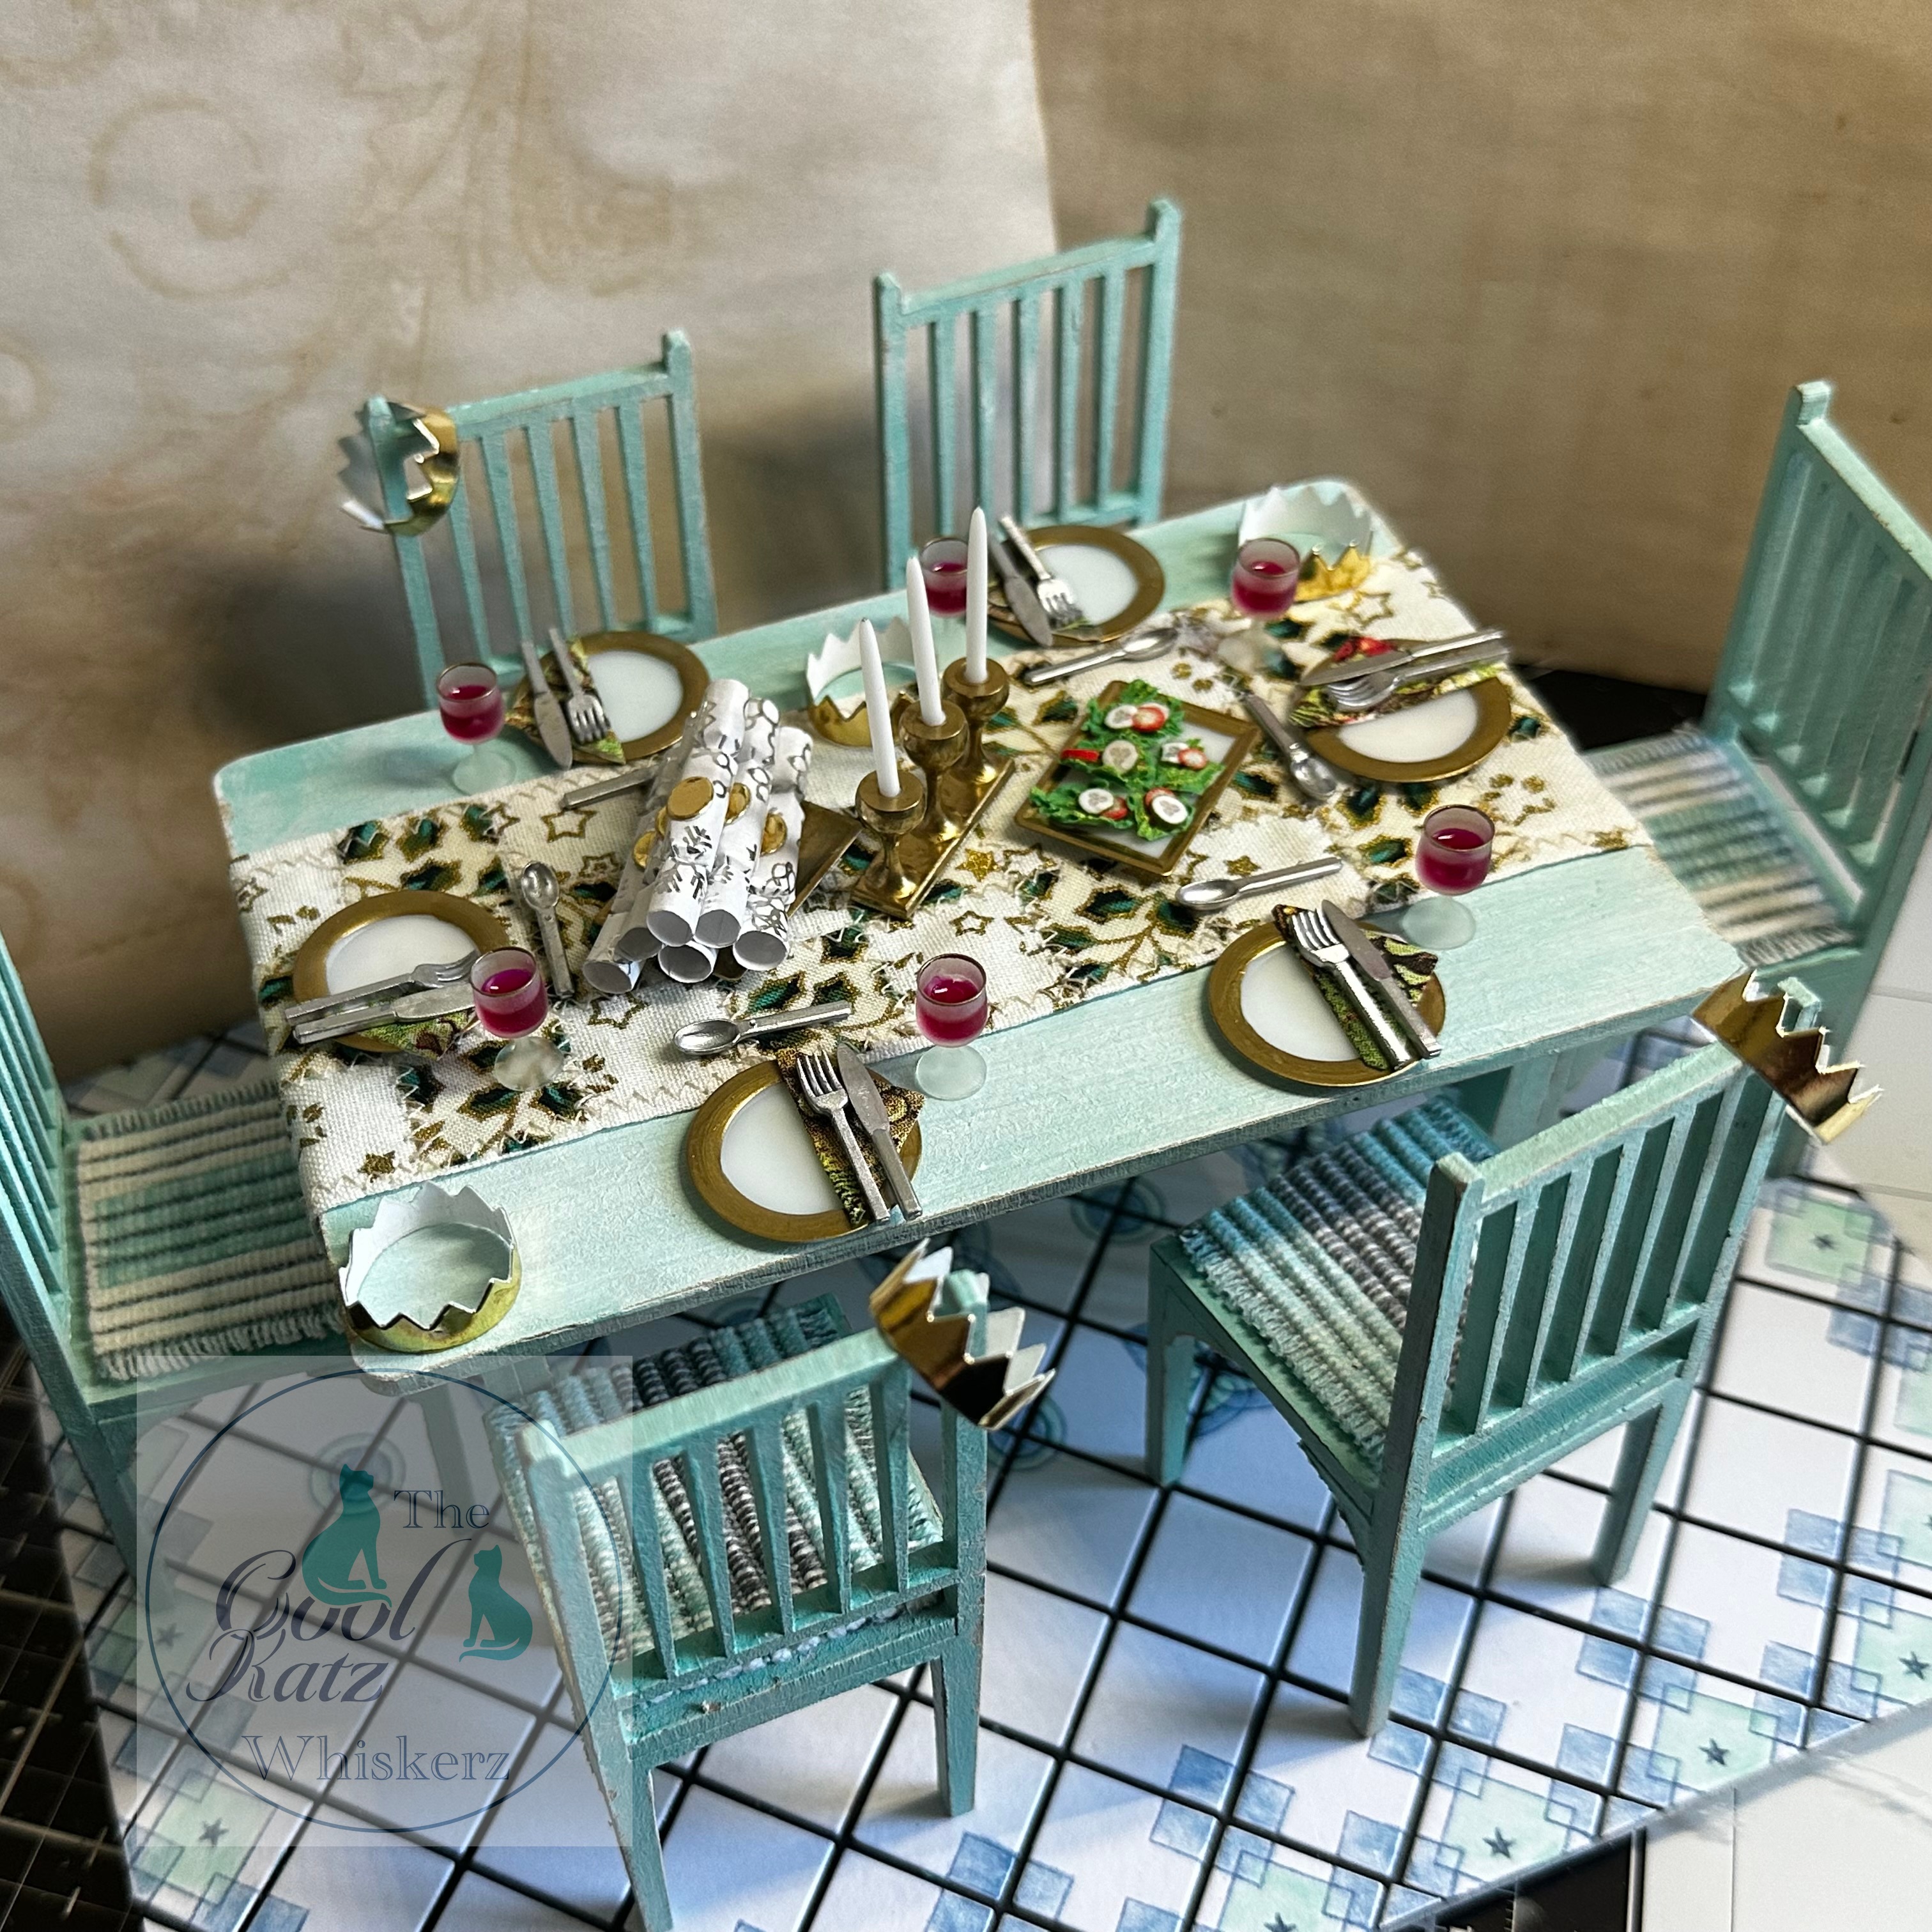
Now to fill that fabulous large table with lots of festive goodies! Firstly I started with a Christmas table runner down the centre of the table. I will share how I create my miniature faux patchwork in my Fireplace blog post, otherwise this post will turn into a post of epic proportions lol.

I added the finished patchwork table runner to the table top using a dash of Tacky Glue under the darker squares along with a few drops on the edges of the table to hold it down in place.
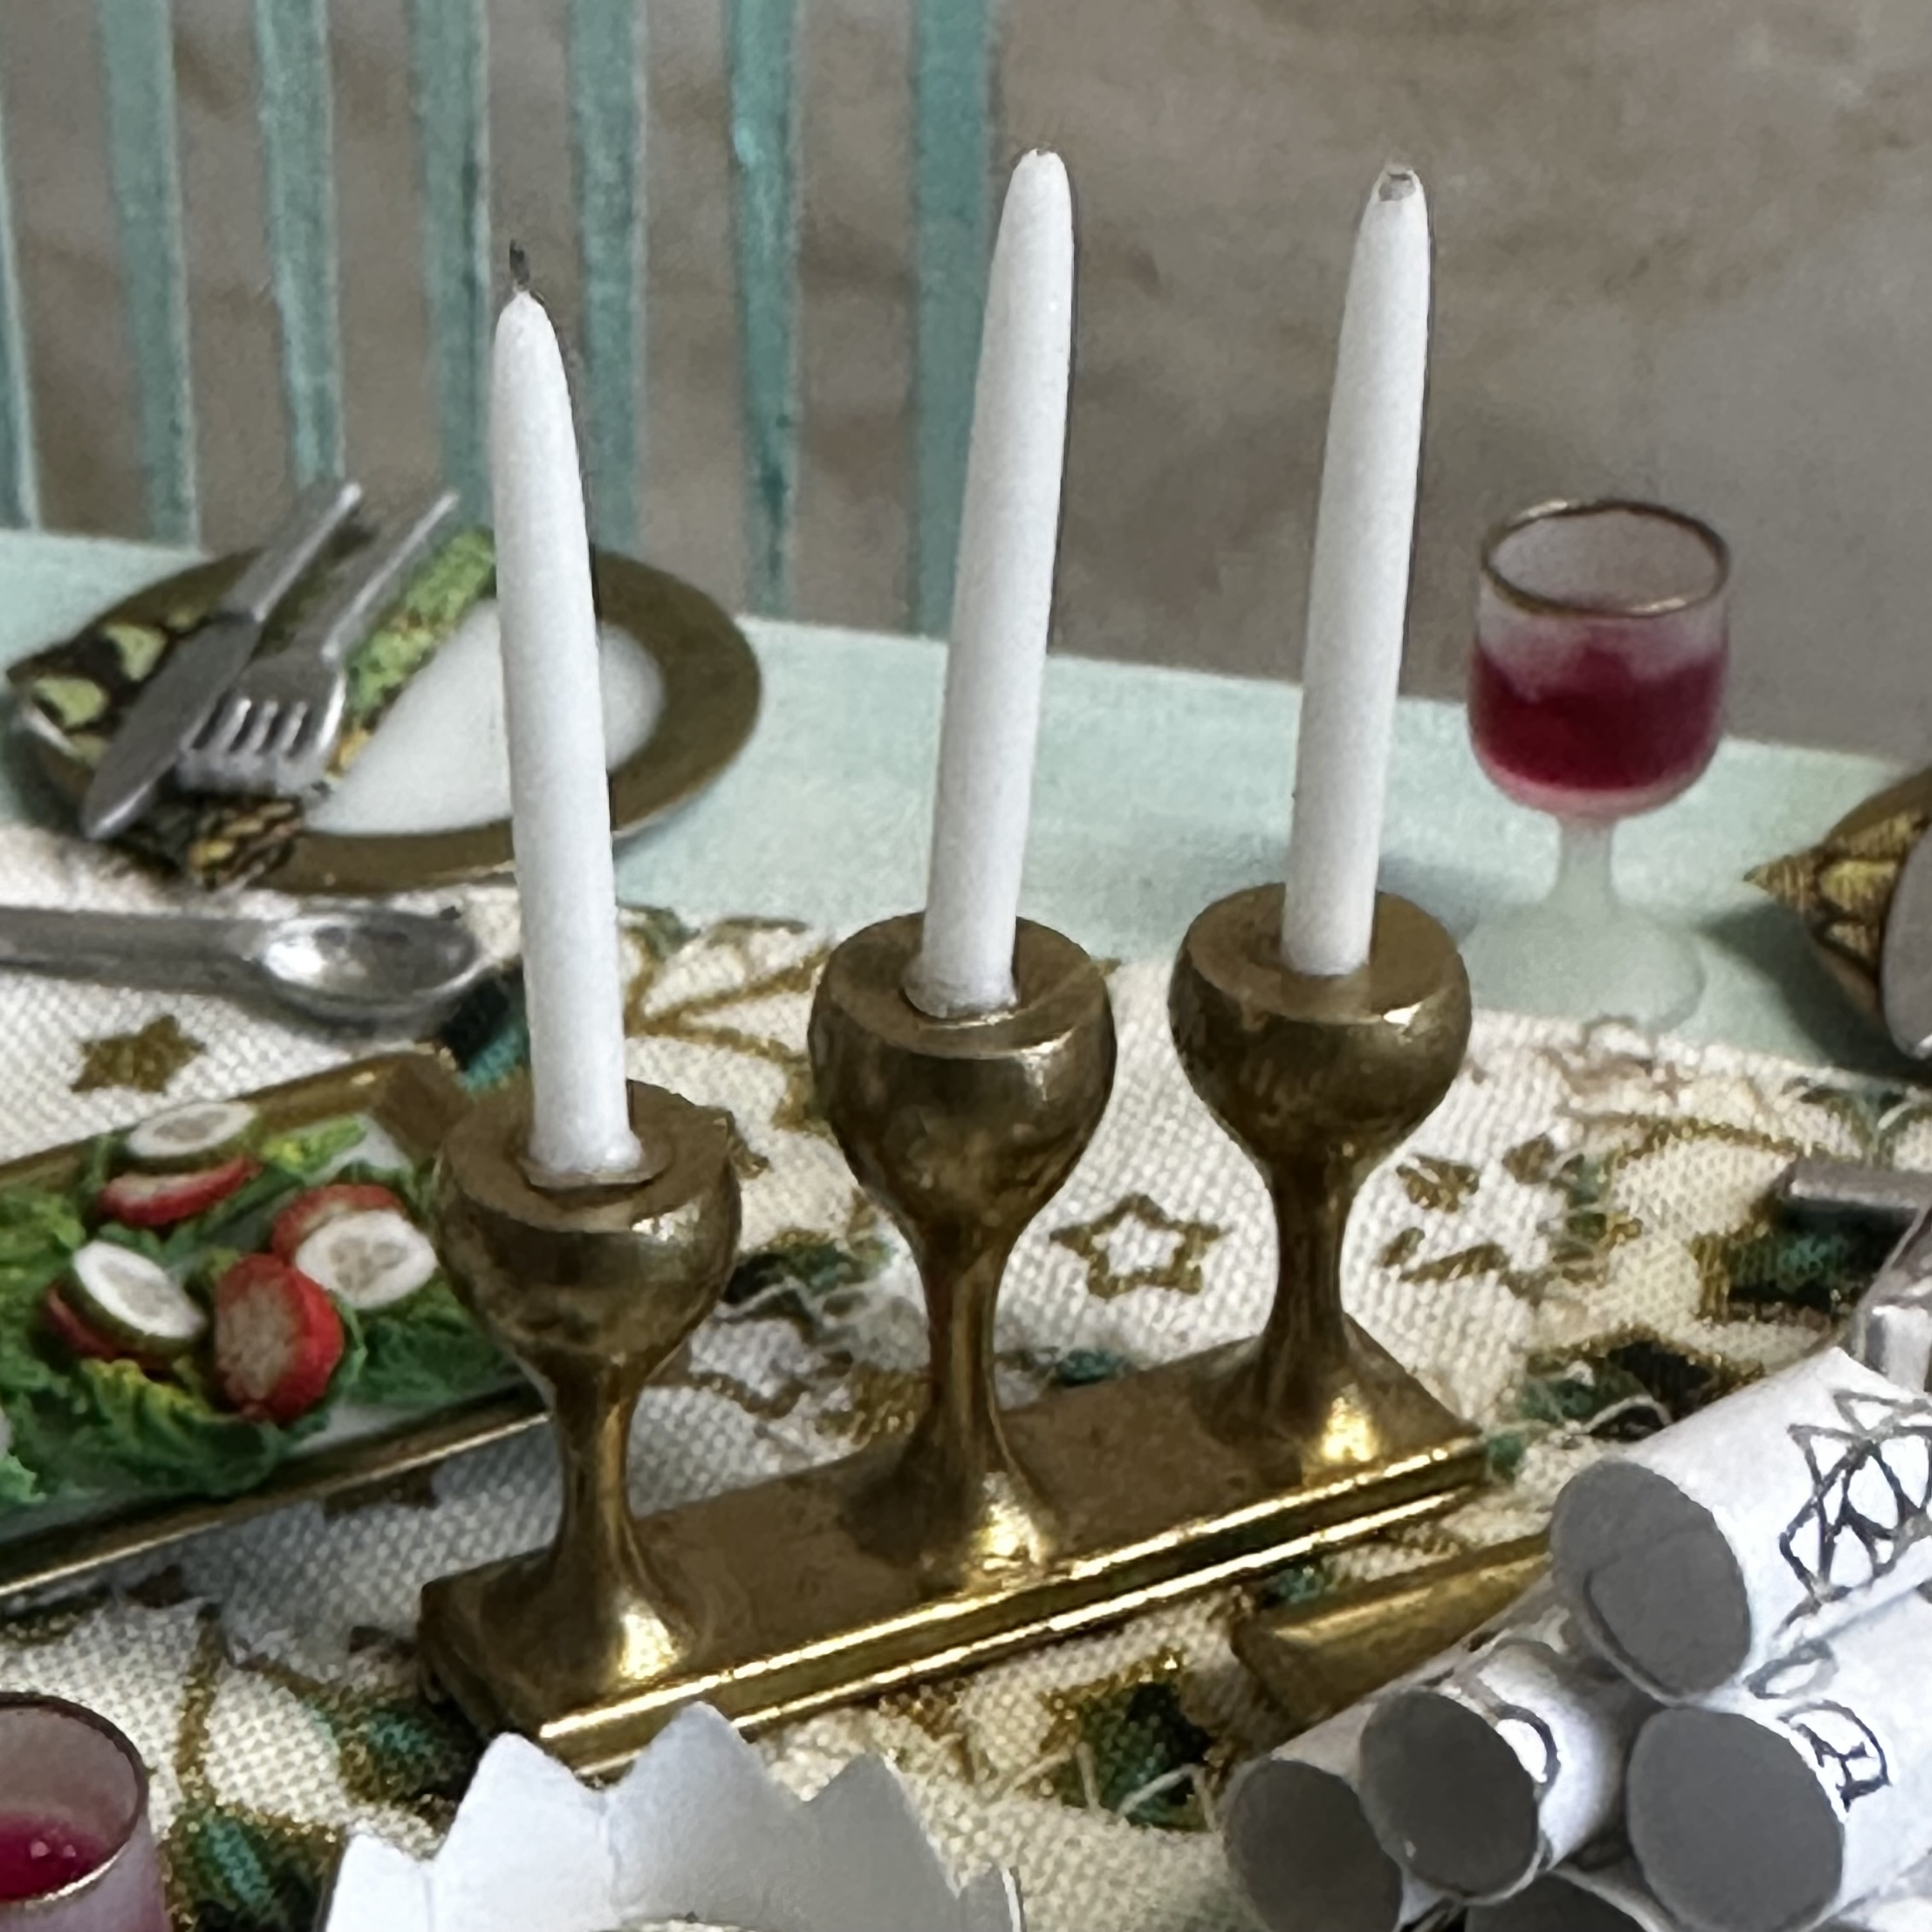
Now to decorate the crockery and glassware. I pop a piece of double sided sticky tape onto a lolly stick. This gives me something to hold onto whilst I decorate the edges of with a gold calligraphy pen. I used the same technique for the candle holder, but for the cutlery I used tweezers to hold onto them whilst I added silver pen.
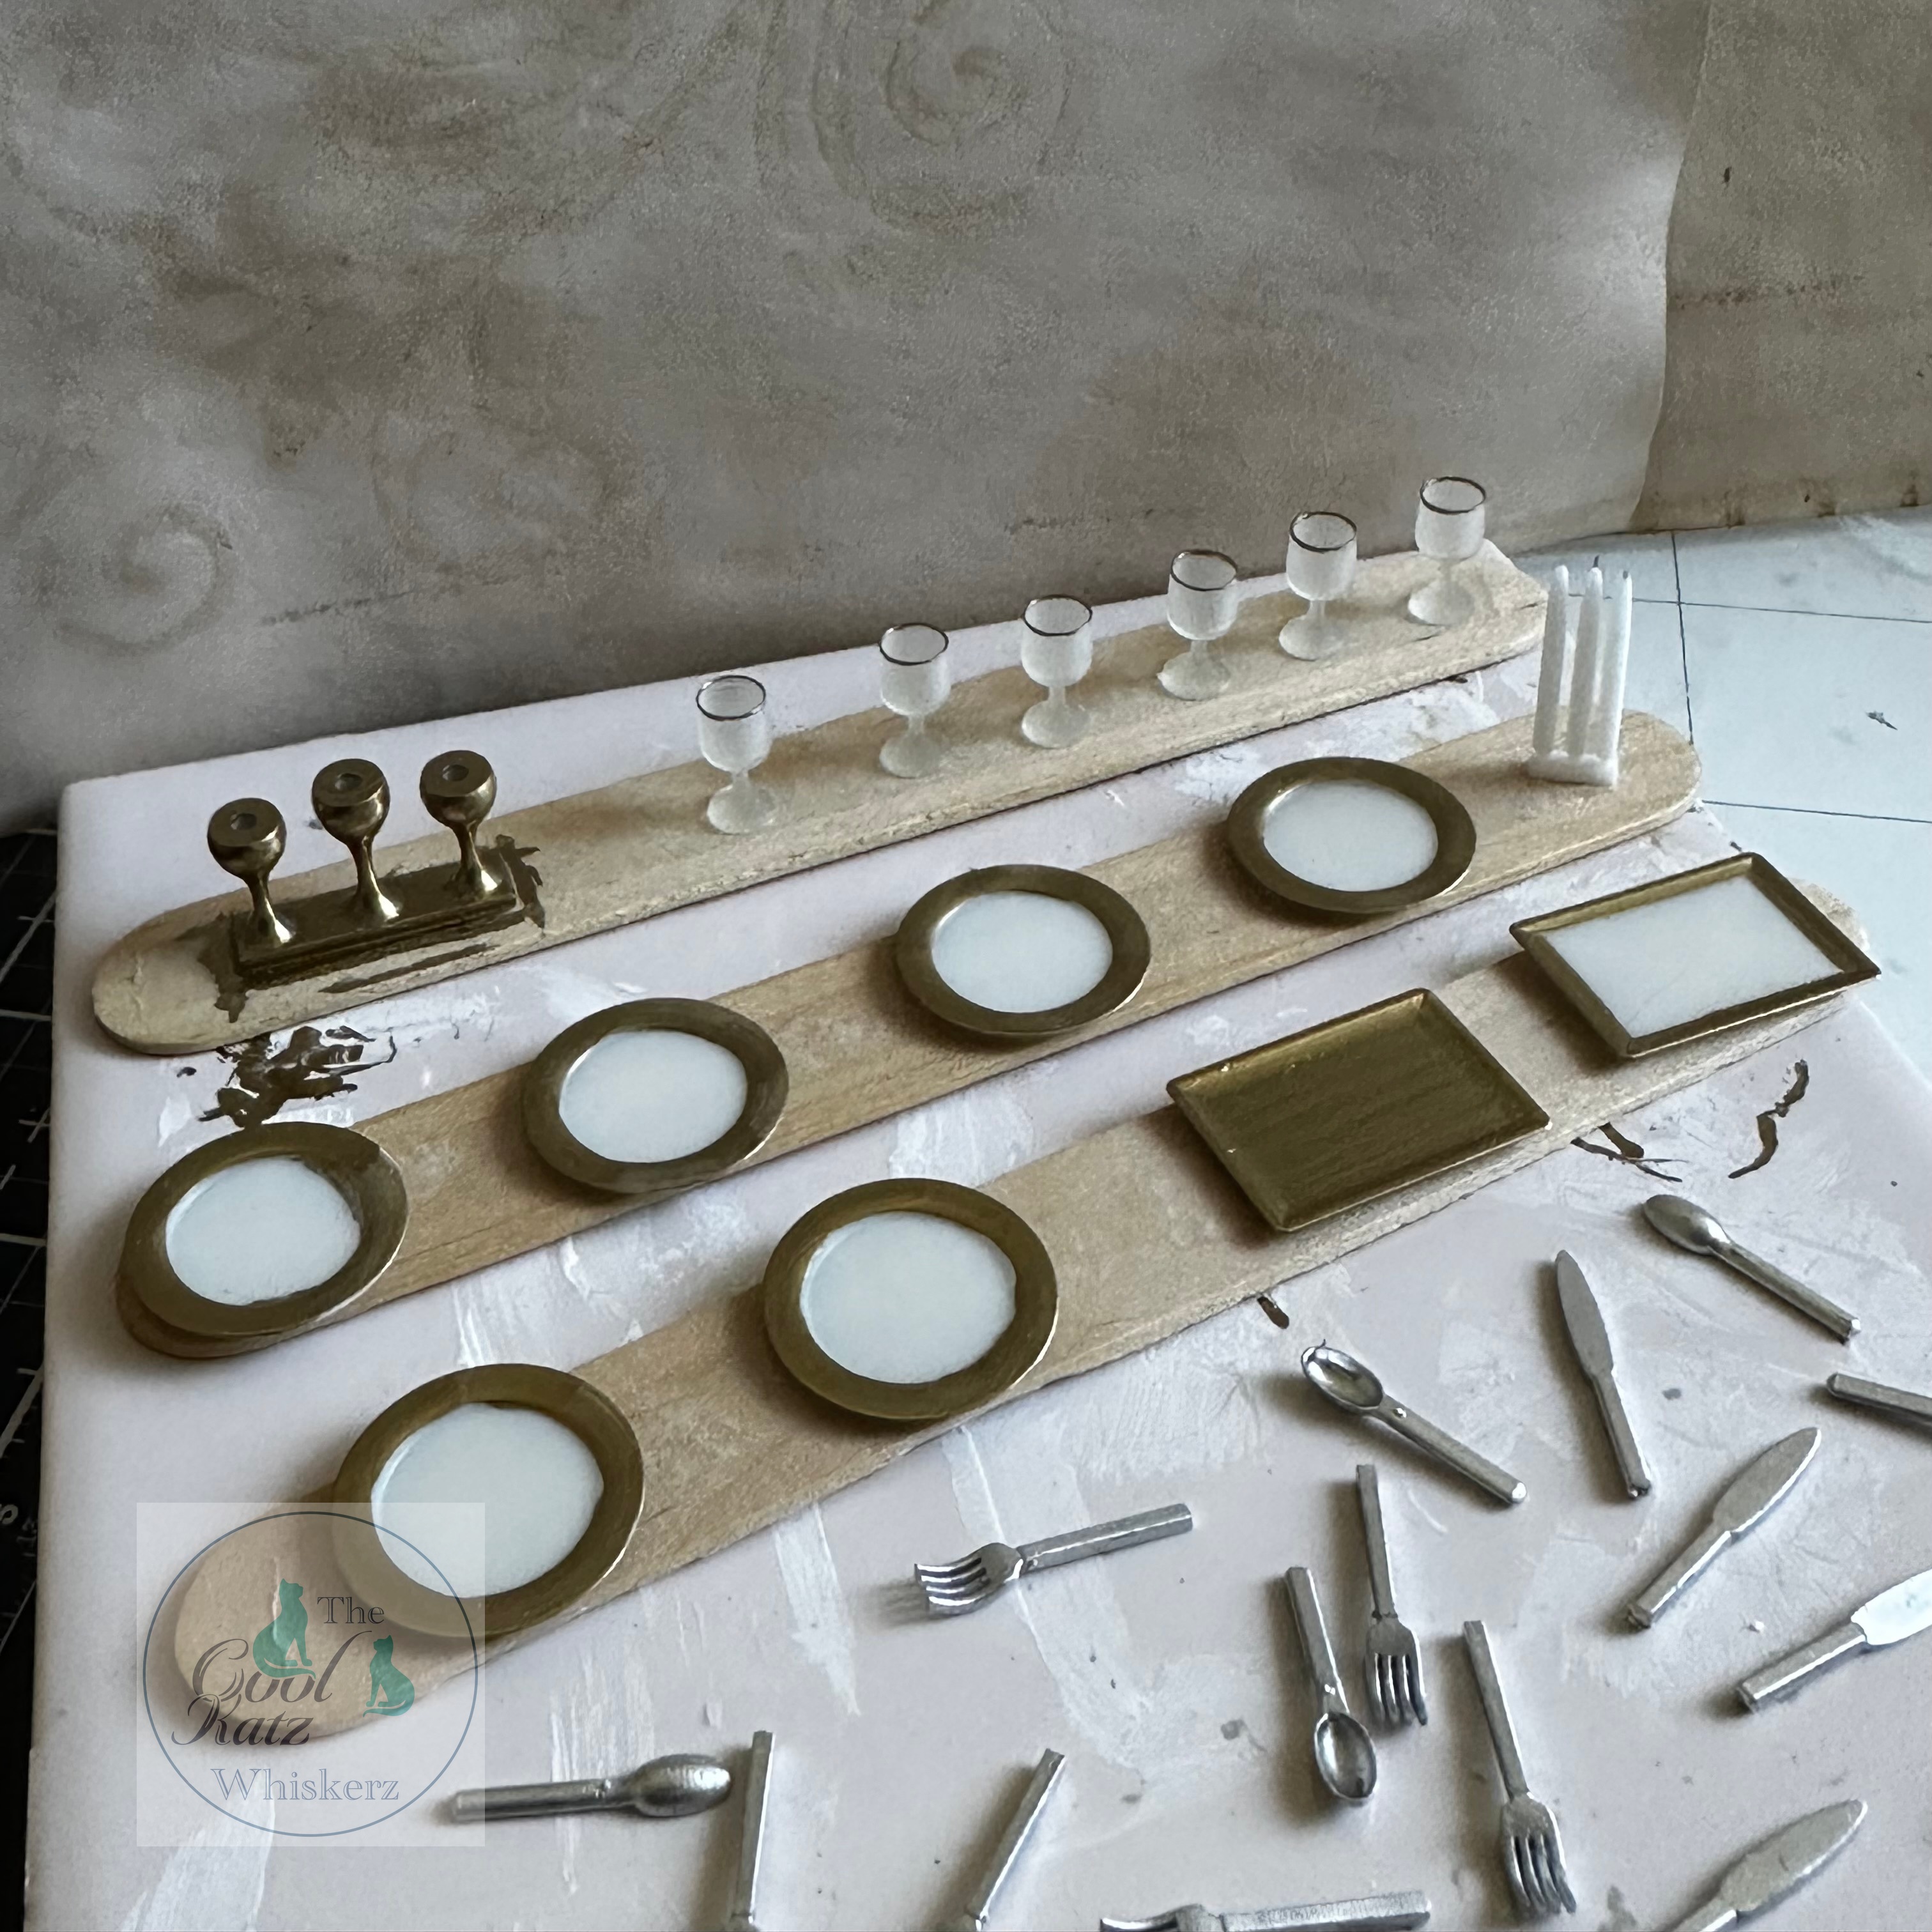
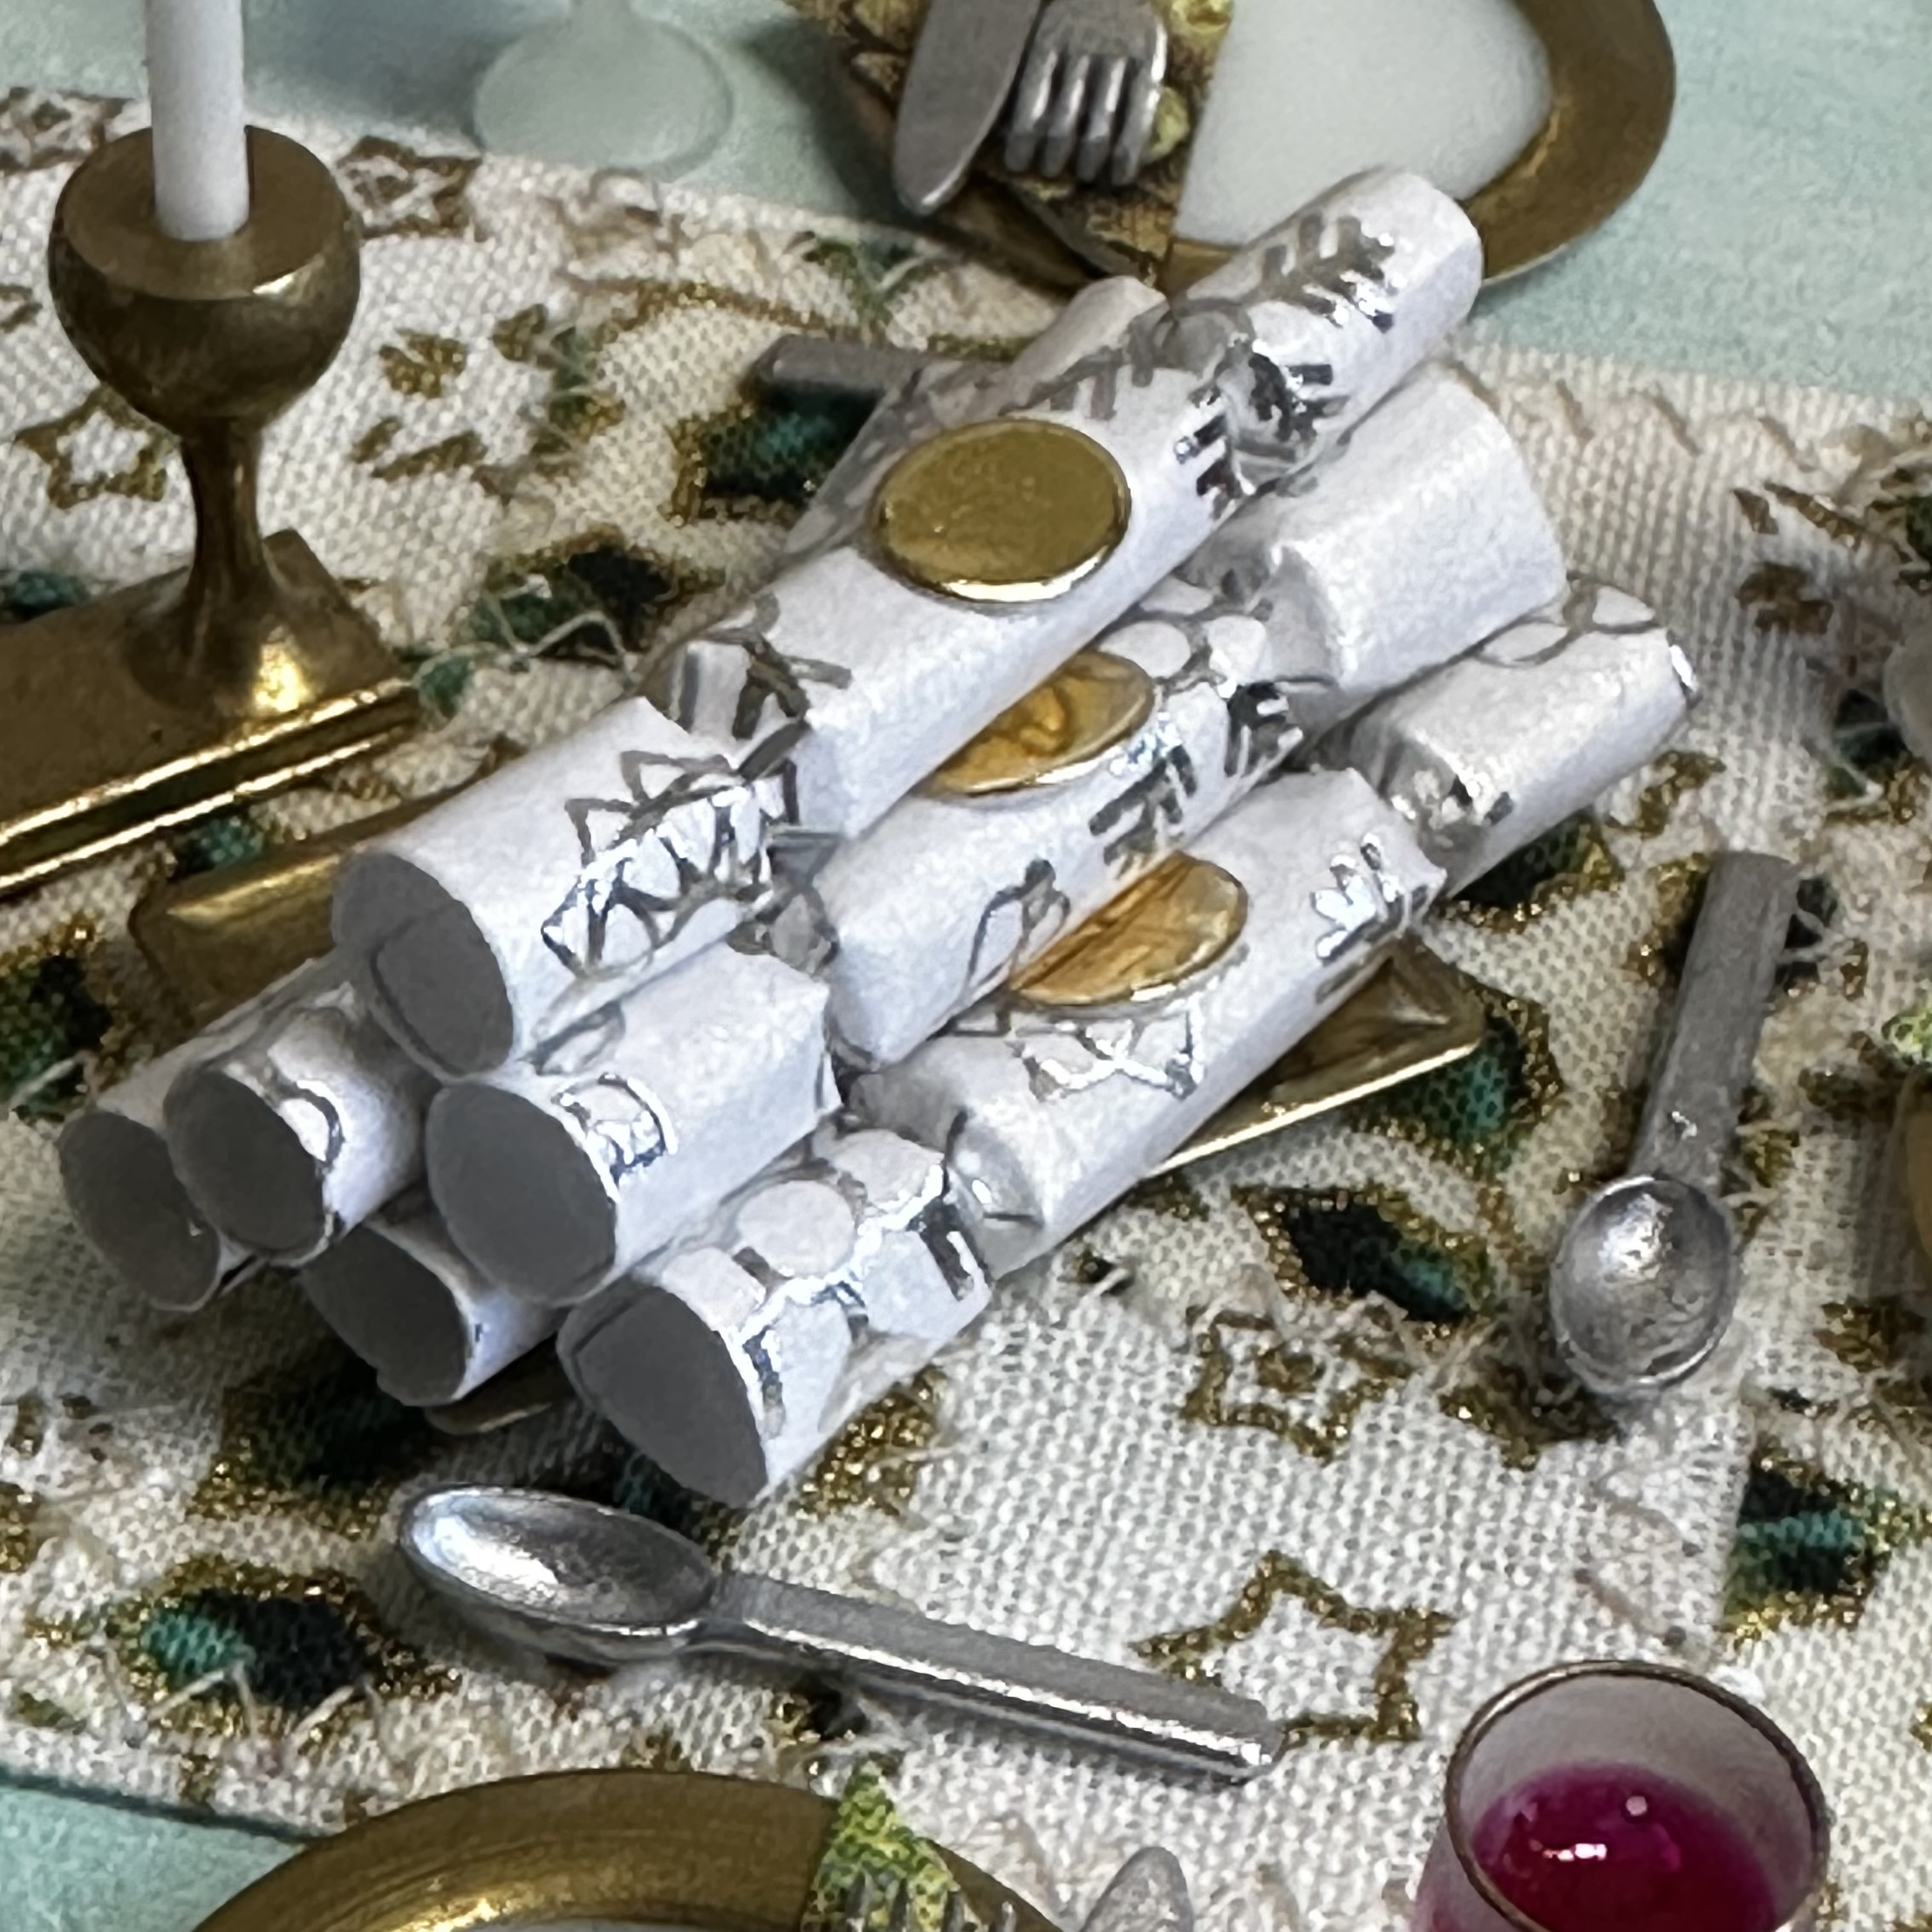
Now to set the table, I created napkins using the large square tile die from a full sized paper napkin. This was folded in half diagonally and glued into the plate. If like me you had a couple of plates that weren’t as neat as the others, this is where you can hide those flaws! I added the knives and forks onto the top of the napkins for a different look, and the spoons were added onto the table above the plates ready for pudding.
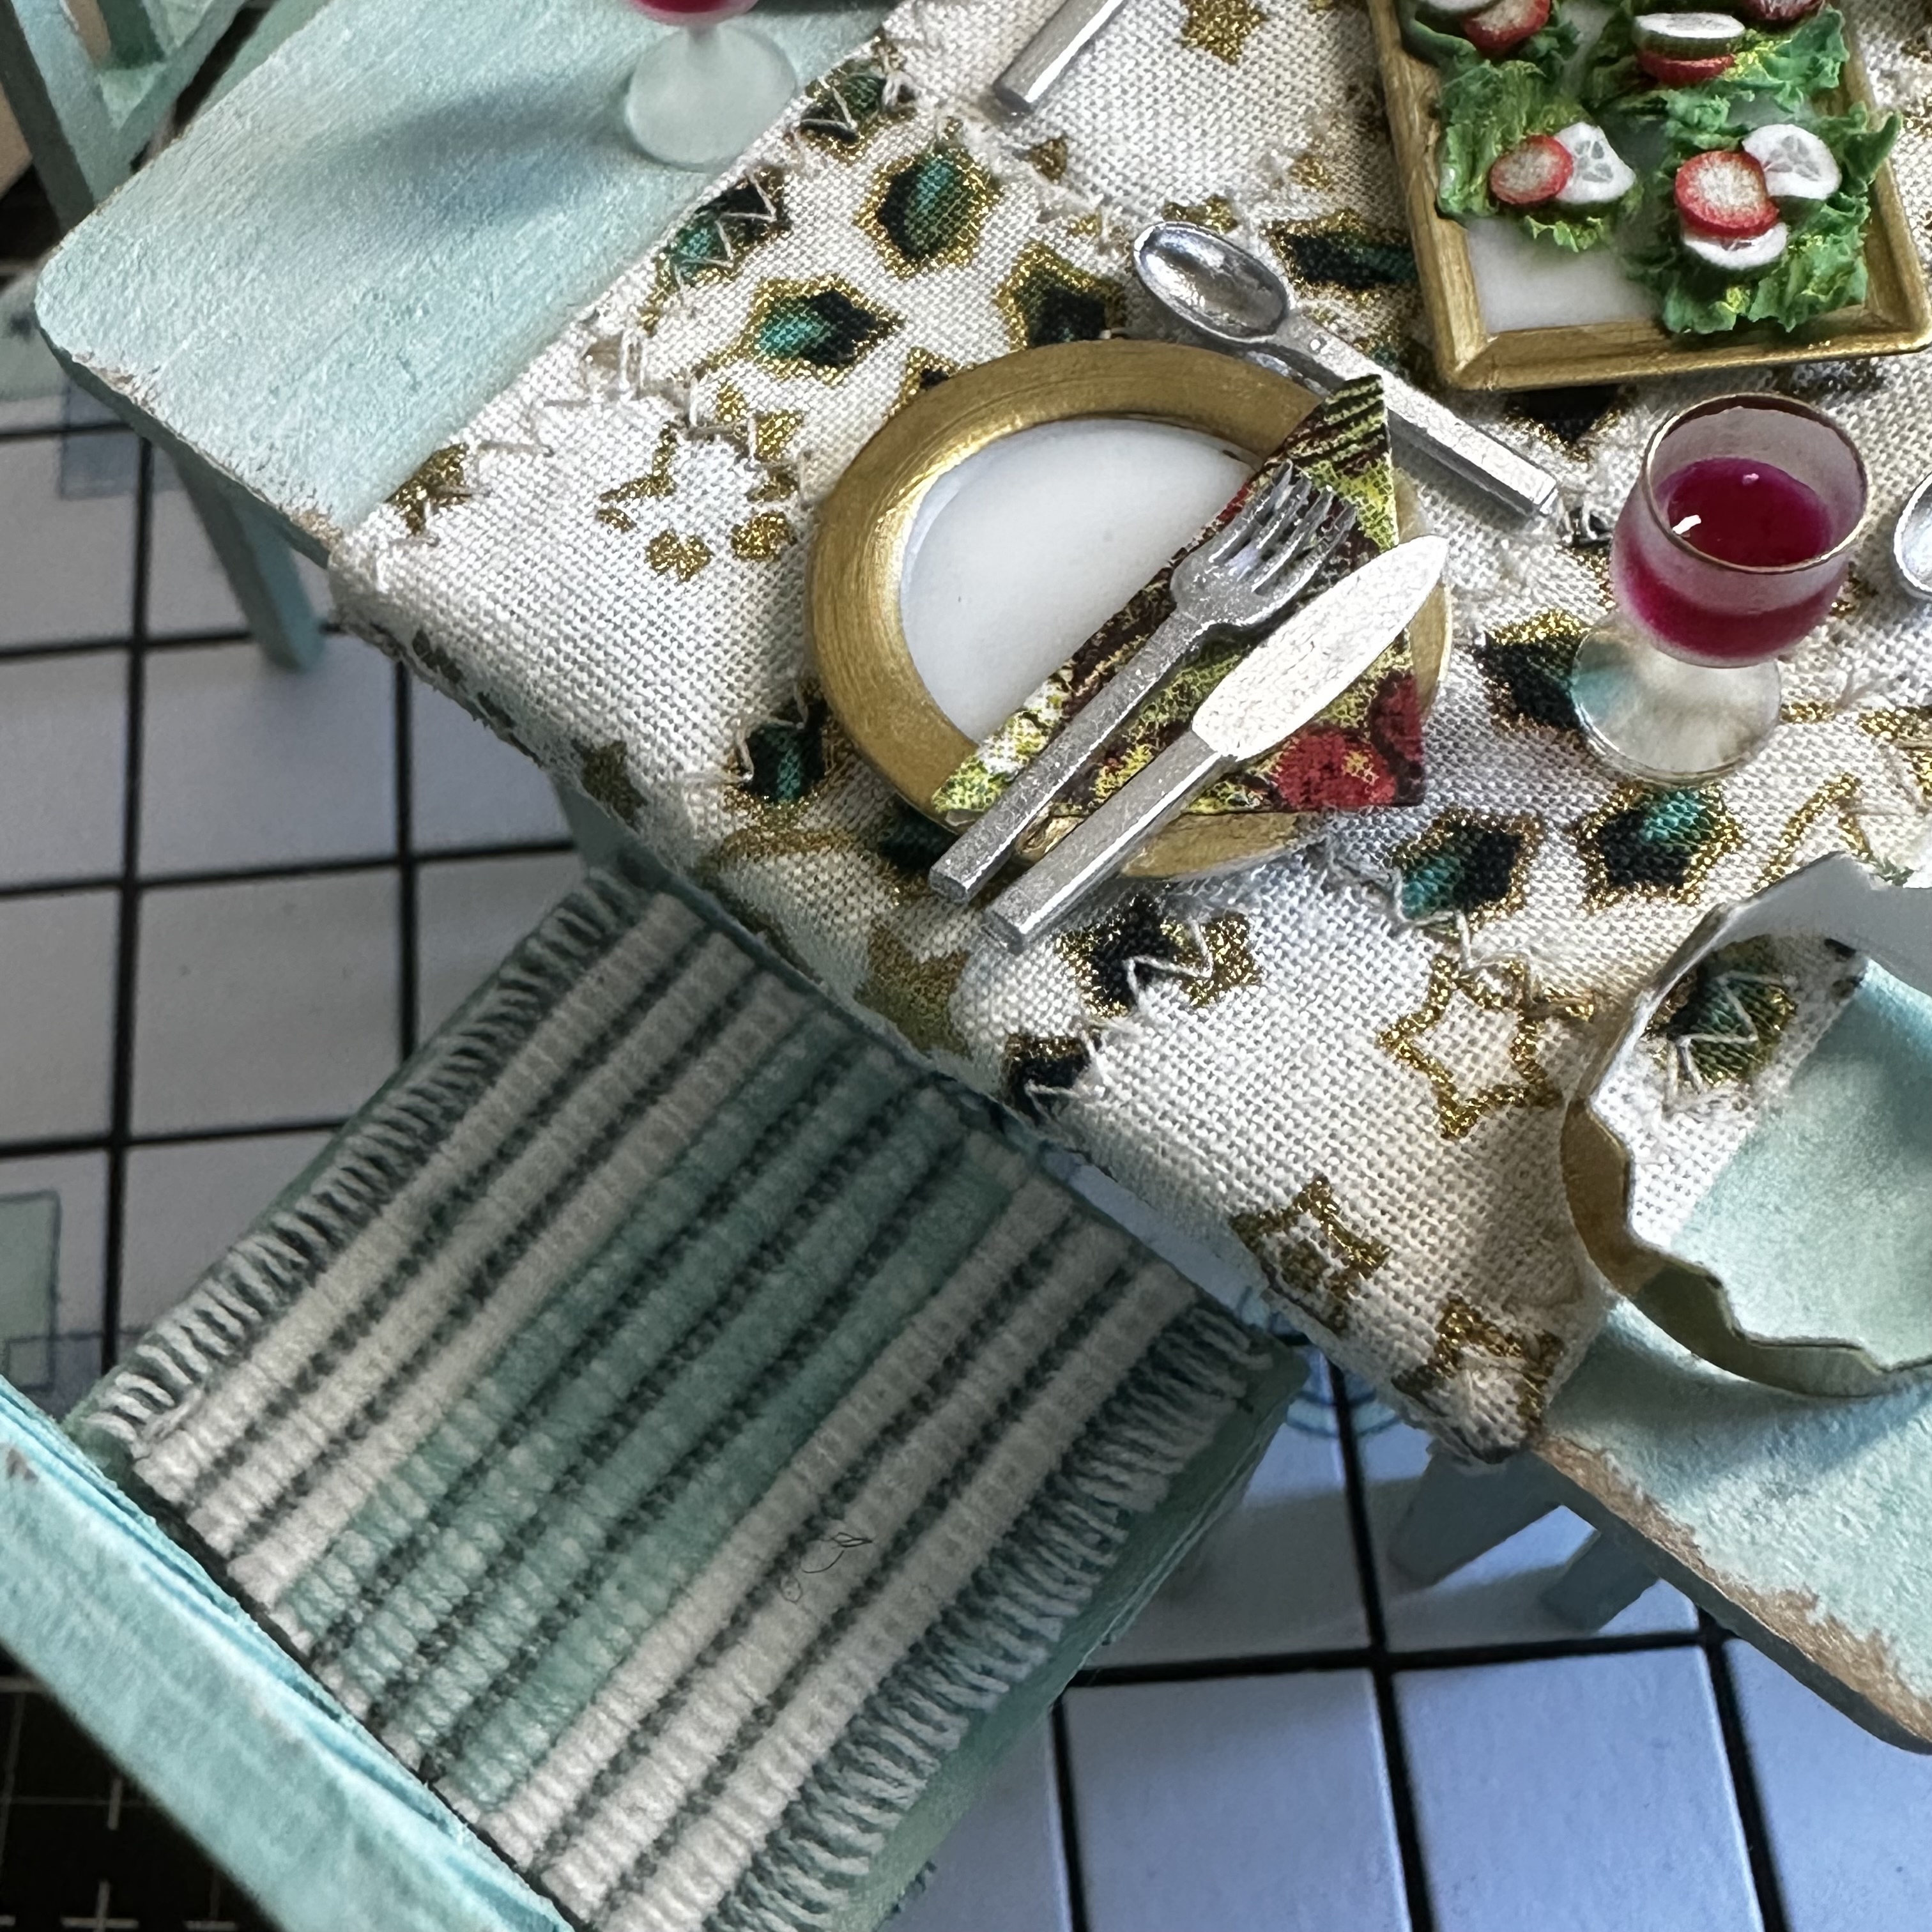
Every place setting has it’s own gold crown and also a nice glass of something red to go with the meal.
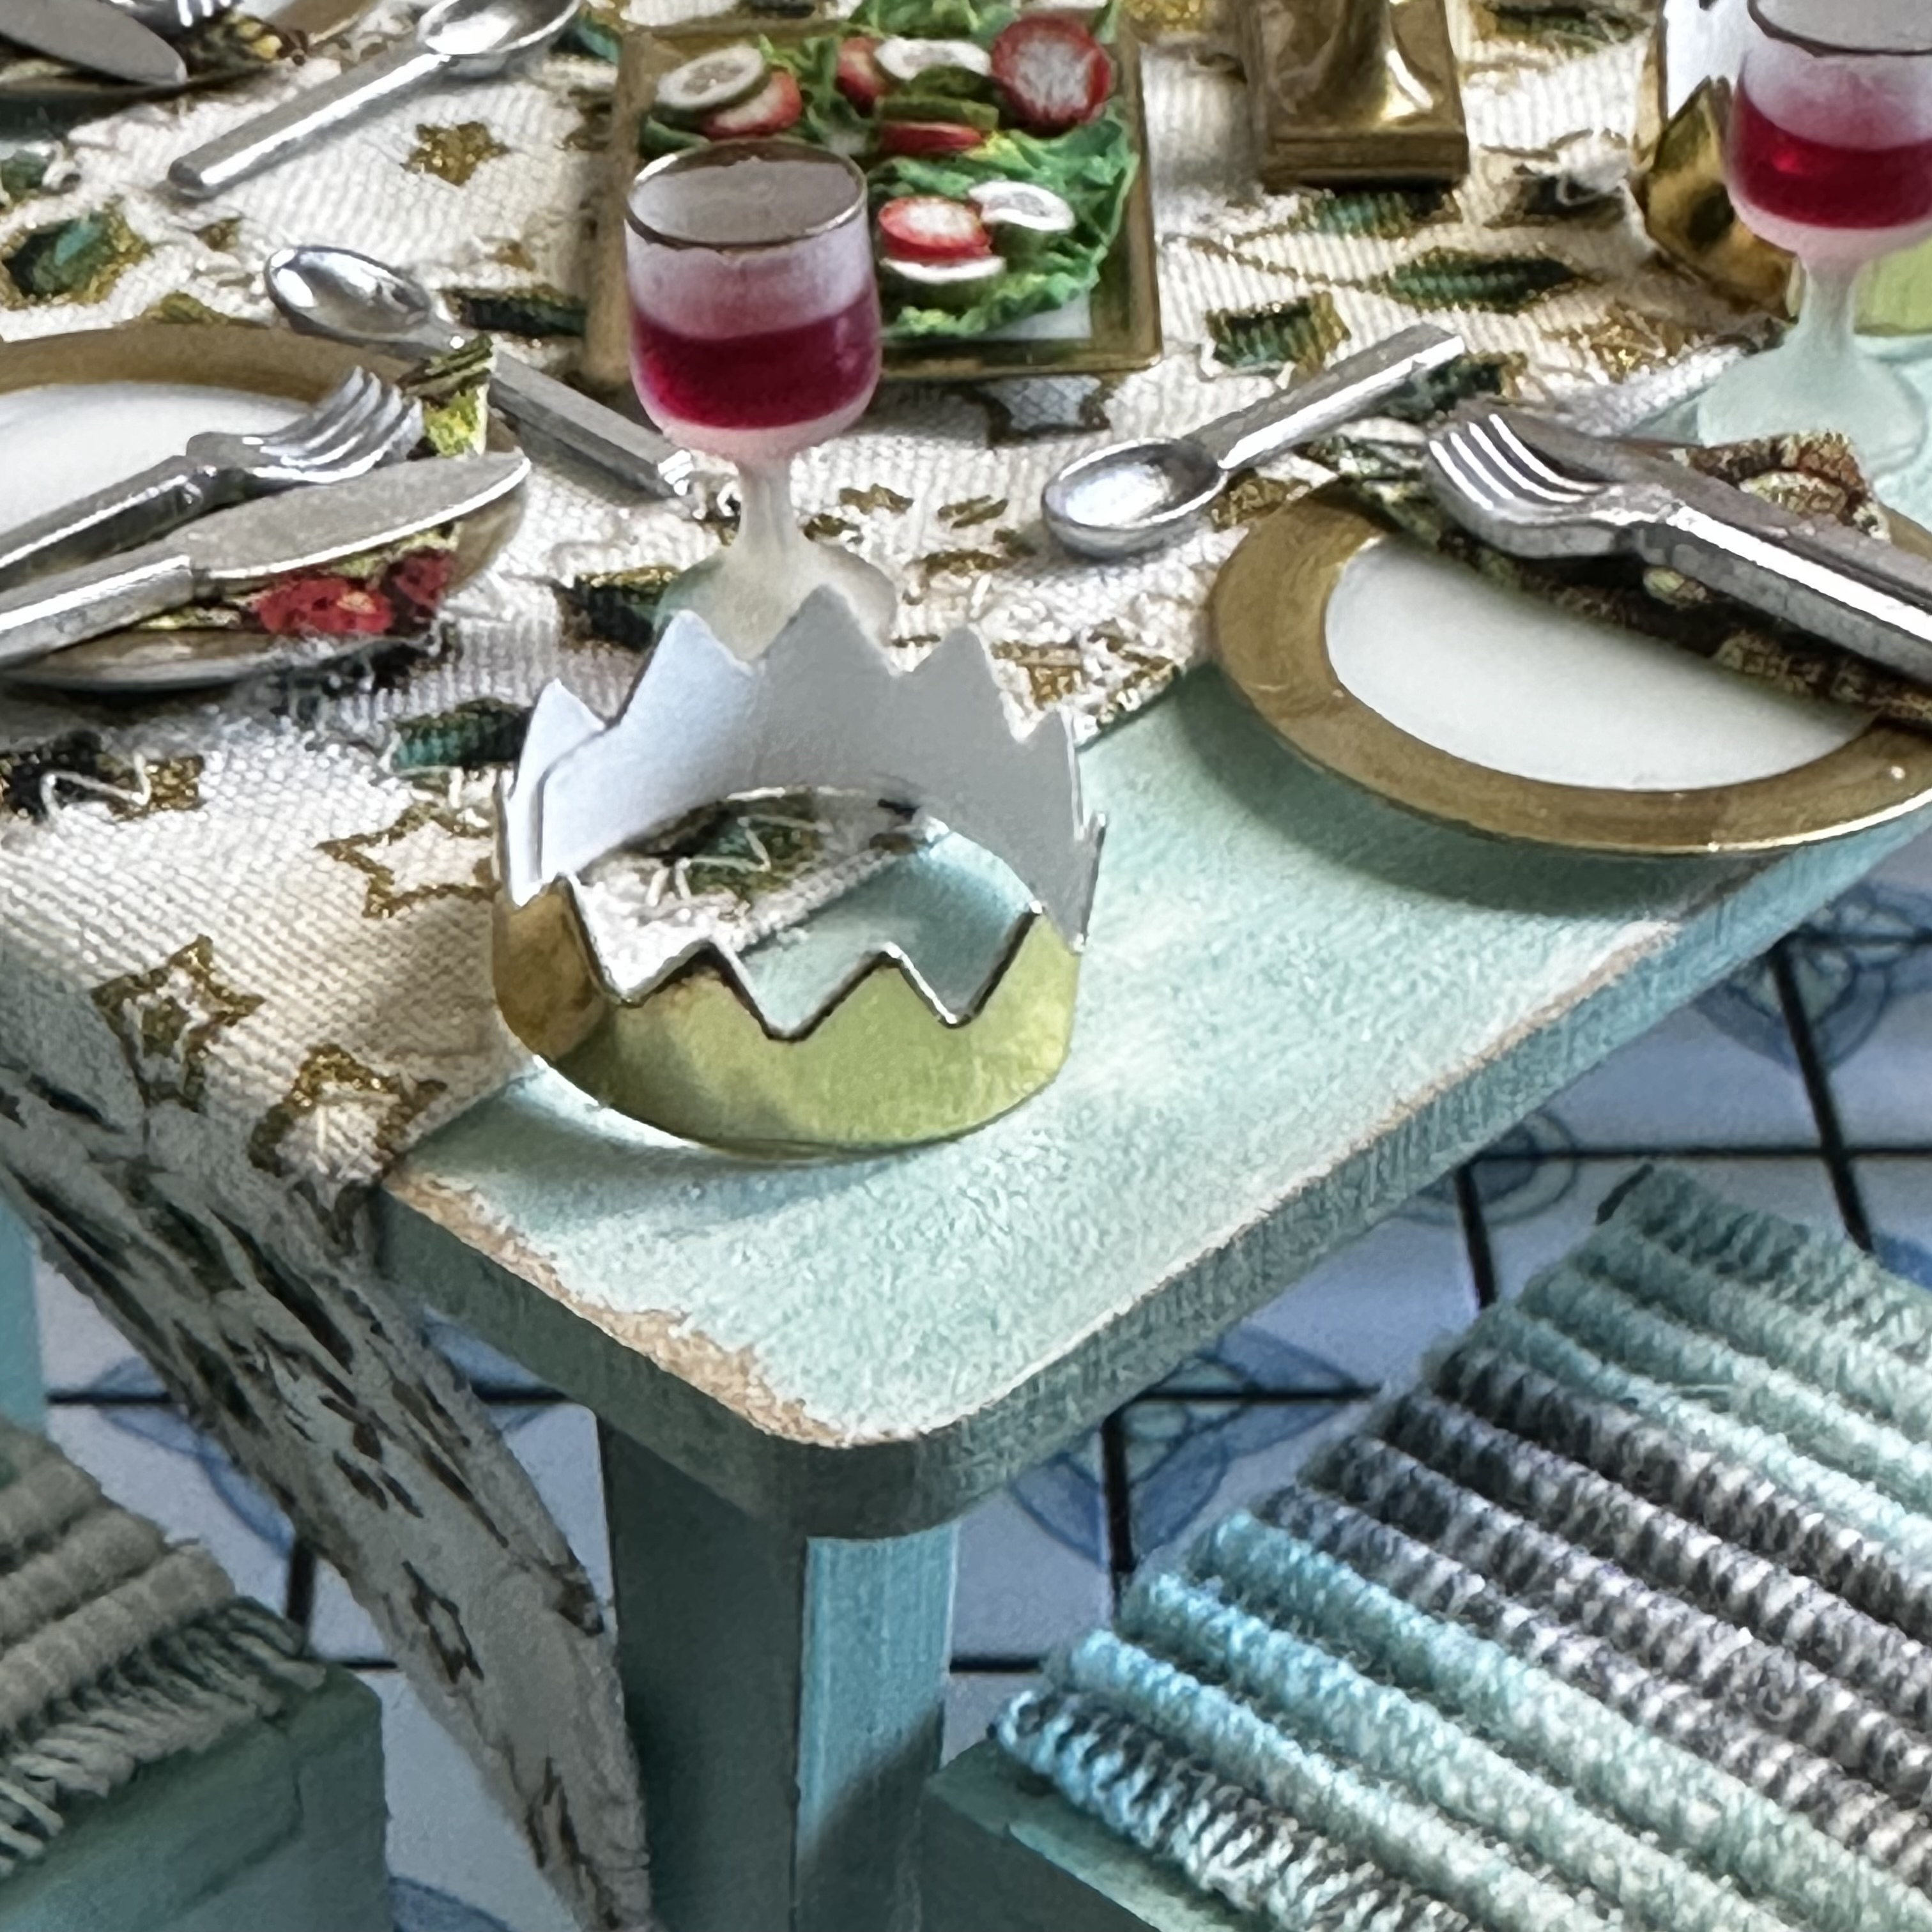
The crackers are created from a heavy weight Christmas paper with gold ovals added to the top for decoration.
The candle holder was coloured using the gold calligraphy pen, before adding the tall taper candles.
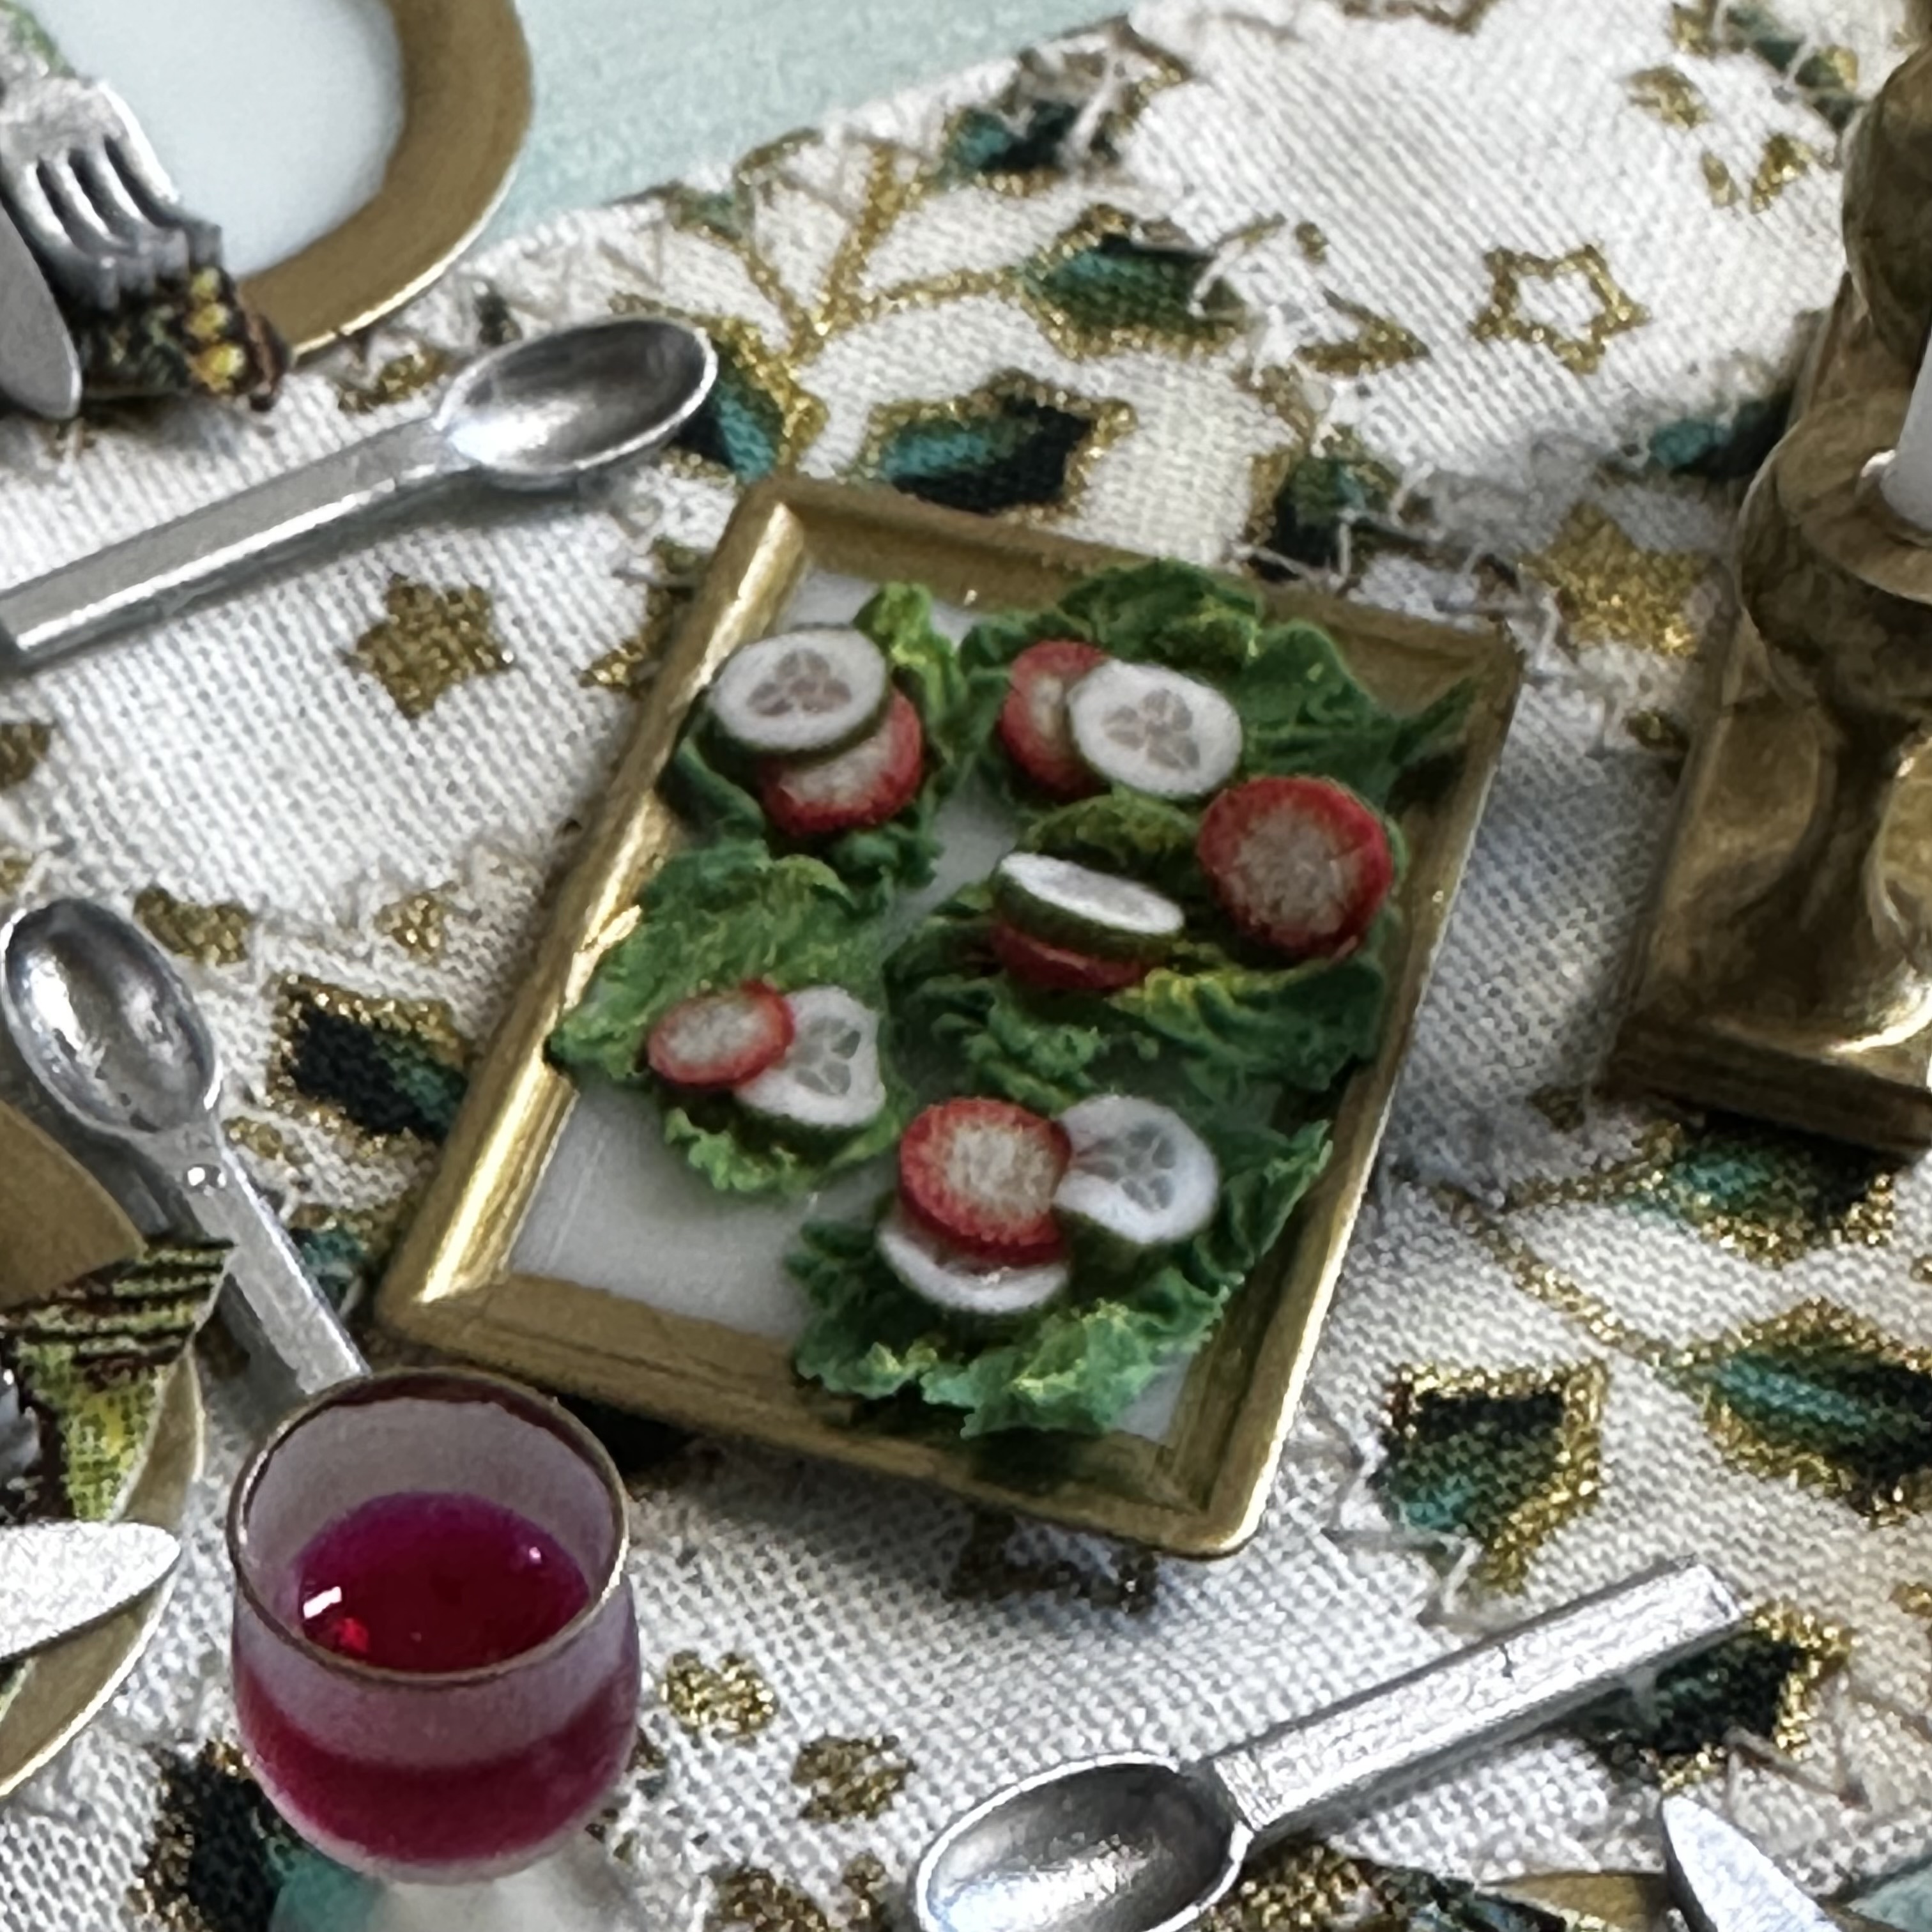
This Christmas dinner will be starting with a salad, the prawns were still in the fridge at the time of this photo……………...

What a beautiful table scene and tiled floor, the more you look, the more you see. If you've been inspired by Elizabeth, you can find the products below.
https://www.coolkatzcraft.com/1-12-scale-table-scene
https://www.coolkatzcraft.com/1-12-1-24-mini-cracker-stocking-die-set
https://www.coolkatzcraft.com/1-12-scale-tile-spacer-die-set
https://www.coolkatzcraft.com/1-12-scale-stamp-set
https://www.coolkatzcraft.com/1-12-card-envelope-die-set
https://www.coolkatzcraft.com/ergonomic-stamp-text-tool
https://www.coolkatzcraft.com/teflon-multi-purpose-crafting-tool-bone-folder